DVD Data Recovery Mac
Easy DVD Data Recovery for Your Mac
Has a recent data loss or damage to a disk caused havoc when it comes to accessing your files? These types of events happen from time to time because a disk becomes scratched or file is removed accidentally only to realize it was still needed. Once the file has been removed or is inaccessible, what can you do? How do you perform disk data retrieval Mac? The easiest solution is to use a tool capable of scanning disk, locating the files, and recovering the information for you.
Stellar Phoenix Mac Data Recovery is a utility you can use to quickly scan the DVD and safely store the files in another location. When a file is deleted from media such as a DVD or CD, it is not actually gone. Just as with a hard drive, it remains there until something new overwrites it. This creates a timeframe where it is possible to use a retrieval tool to regain this information. Mac Data Retrieval is exactly what you need to quickly regain any files that might be lost or deleted from a disk.
How does it work and what features does it offer? Mac File Retrieval scans the physical storage media to locate any file that can be retrieved. Once you have installed the utility, all you need to do is open it and insert disk into the drive on your computer or to a connected external reader. Then follow the steps in the tutorial below to configure your scan. After scanning has completed, a number of features and options are provided to make the retrieval process a breeze including:
- File Preview Options
- File Search Capabilities
- Scan Result Organization Options
- Selection by File Type or Format
- Complete File Recovery
- Customized File Retrieval
Before you begin, make certain you have installed Stellar Phoenix Mac Data Recovery to the computer. After which, insert the DVD into a drive on your computer or an external reader. Finally, open the utility and complete this tutorial to retrieve lost or deleted files.
4 Steps to Get DVD Information Back
Remember to insert the disk into your media drive or an external reader before starting the tutorial. Choose Start New Scan after opening the utility.

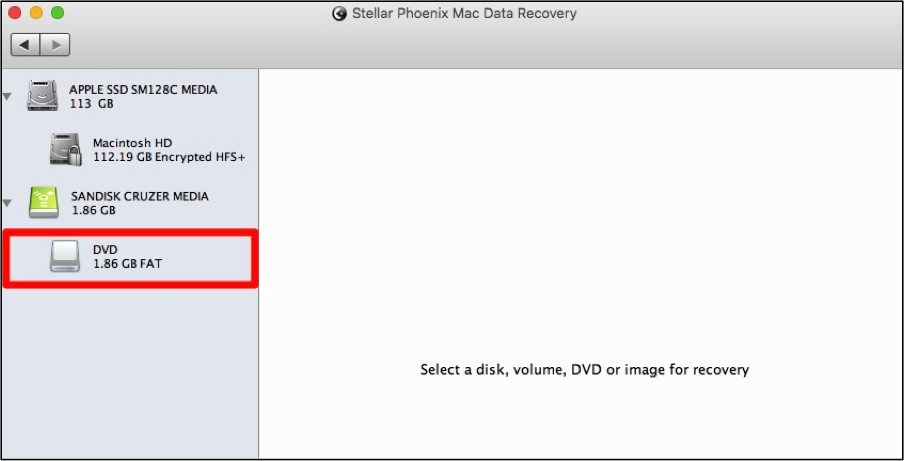
Step 1: Select the DVD for Scanning. If the DVD has been inserted into the computer, it will appear with the drive letter in the left panel. Otherwise, you will see the name of the external reader used to read the disk.
Click on the appropriate item in the left panel to select the disk for scanning. In this example, it is labeled DVD to keep it simple.
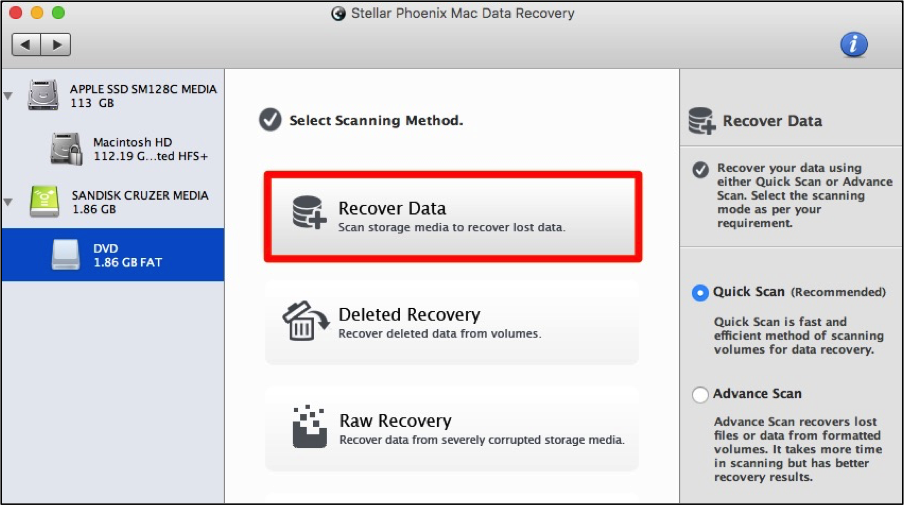
Step 2: Configure Options and Scan. The easiest way to find data on a disk is by performing a Quick Scan. Additional options are provided to find deleted files or to complete a deeper scan.
We recommend trying a basic scan first to see if you can locate the files because this is the faster option. First click on Recover Data and then tick the radial for Quick Scan (if not already selected).
Next, click on the Start Scan button at the bottom of the scanning options to begin locating the file on your disk.

The scan should only take a few minutes to complete for physical storage media such as a disk. Once finished, click on OK to close the confirmation window and see the results of your scan.
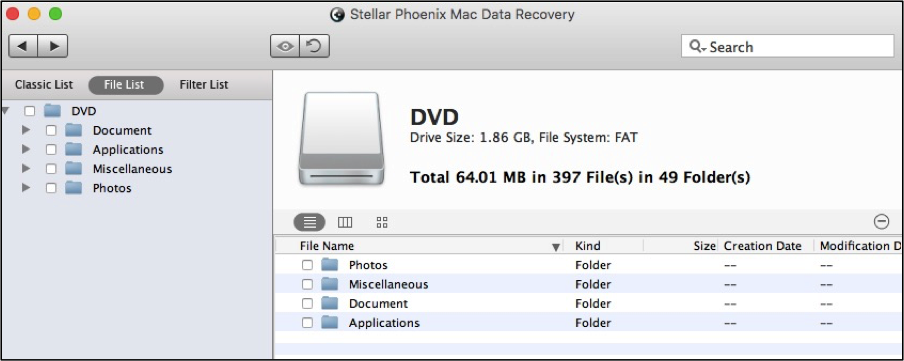
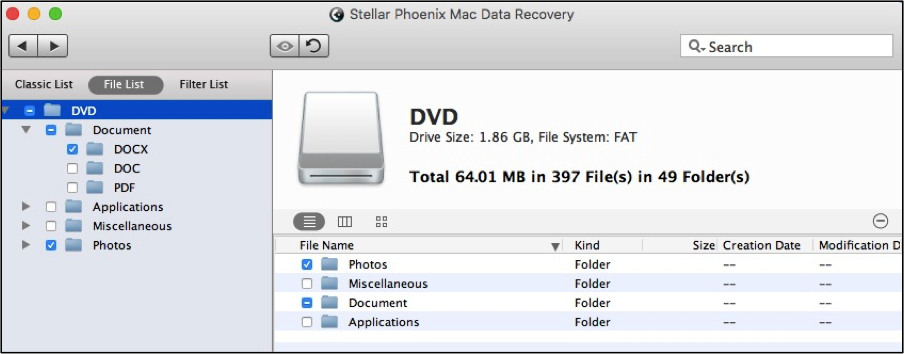
Step 3: Select Files from the DVD. Click on File List to view the file types and formats stored on disk.
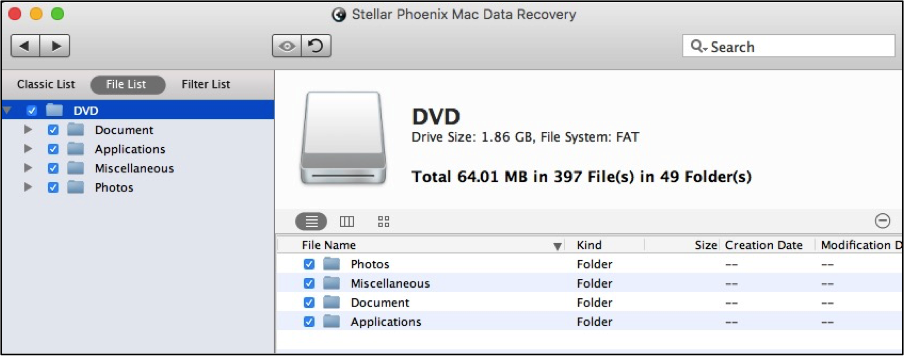
Next, click on the checkbox for the disk to inform Mac Data Retrieval to retrieve all scan result. Then advance to the next step to complete the retrieval.
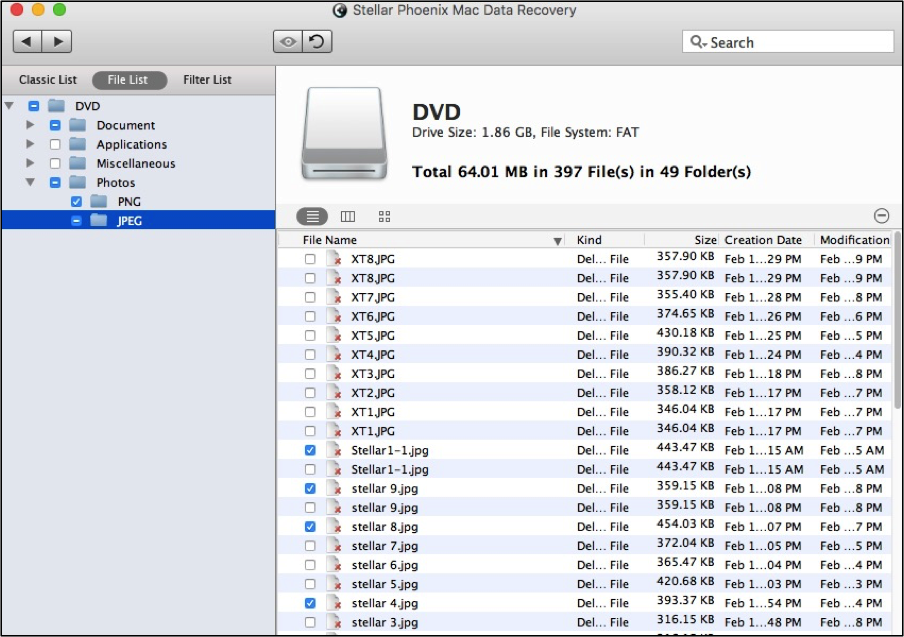
If you do not want to recover every file, click on the arrow for a file type to expand the tree and view each format found for the chosen type. Use the checkboxes to select any type or format you want to recover.
If you are searching for specific files on the disk, click on a format folder to view each file on the right side of the utility window. Then check the box for each file you want to retrieve.
Step 4: Recover Files from the DVD. After making your file selections, the recovery is not finished until you have clicked on the Recover option at the bottom of the screen. Choose a save location for Mac Data Retrieval to place the retrieved files and then wait for the retrieval to finish.

Lost or deleted information on a disk is an easy problem to remedy with Stellar Phoenix Mac Data Retrieval. The tutorial shown here will help you quickly salvage one or many files from a disk. If the information cannot be found, additional scanning options are provided and can be tried to achieve the desired results. To perform DVD file retrieval Mac, complete these steps:
1. Select the DVD for scanning.
2. Configure options and scan.
3. Select files from the DVD.
4. Recover files from the DVD.