MacBook Pro Data Recovery
A Simple Tutorial for MacBook Pro Data Recovery
An unintentional file deletion or unexpected reformat of your MacBook Pro’s hard drive does not have to be a complete loss. Yes, these occurrences are not the best situation for any Macbook Pro user. However, the data may be retrieved with swiftness and a dependable software. MacBook Pro file retrieval is a reliable way to restore any data you might have lost due to the above reason or other incidents.
Stellar Phoenix Mac File Retrieval provides a painless approach to retrieving everything on the hard drive or individual files. Deletions and reformatting involve removing the logical address used by the OS to locate information. The files do not simply go “poof” but rather stays on the drive for an undetermined amount of time.
Why is this so? As changes are made, each save overwrites old information stored on the drive. It is not until the information has been overwritten that your information becomes irretrievable; performing retrieval immediately increases the odds of regaining your files. By running through the steps shown in this tutorial for Stellar Phoenix Mac File Retrieval software, you will be able to safely and quickly restore files.
Five Steps for Effortless MacBook Pro Data Recovery
Before the process can be started, you will need to first choose the Start New Scan option within the main window of the application.

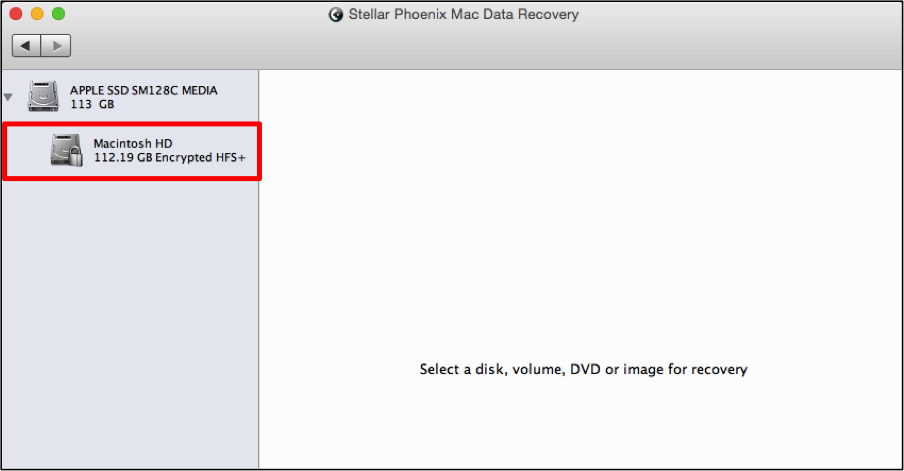
Step 1: Make a Drive Selection. The utility must be informed as to where to search for files. Click on the appropriate volume in the provided screen to make a selection.
Step 2: Select a Retrieval Mode. After choosing a volume, you will see several options for configuring how the data will be scanned for recovery. Click on Recover Data and then ensure the Quick Scan option has been selected to perform a fast data retrieval.
If for some reason the files are not found, then another retrieval mode within this utility might be necessary to deeply scan the MacBook Pro. Certain information may not be retrievable in instances where it has been eliminated by a new save.

Use the Start Scan button at the bottom of this window to begin searching for retrievable information.
Step 3: Scan the Hard Drive Volume. Quick Recovery does not take an extensive amount of time and in most scenarios will be able to locate whatever you may need for a successful file retrieval.
Click the red button next to the progress bar at any time during scanning to pause the process and return at a later time.
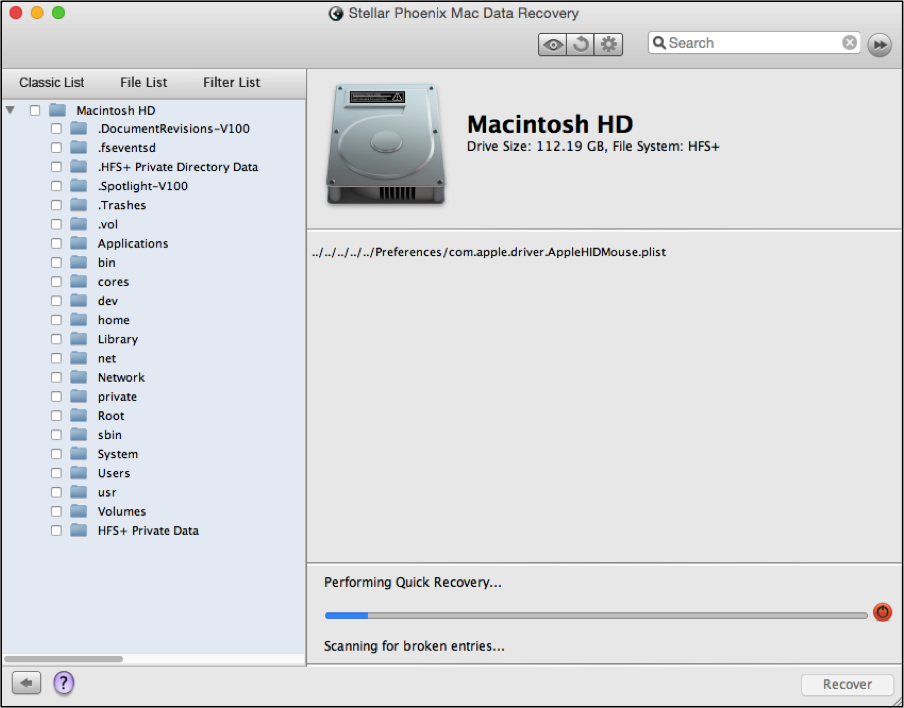
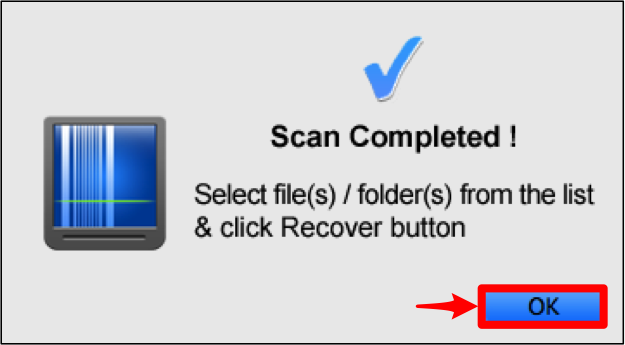
A confirmation message is provided to show that scanning is done and must be closed to proceed to the next step of recovery.
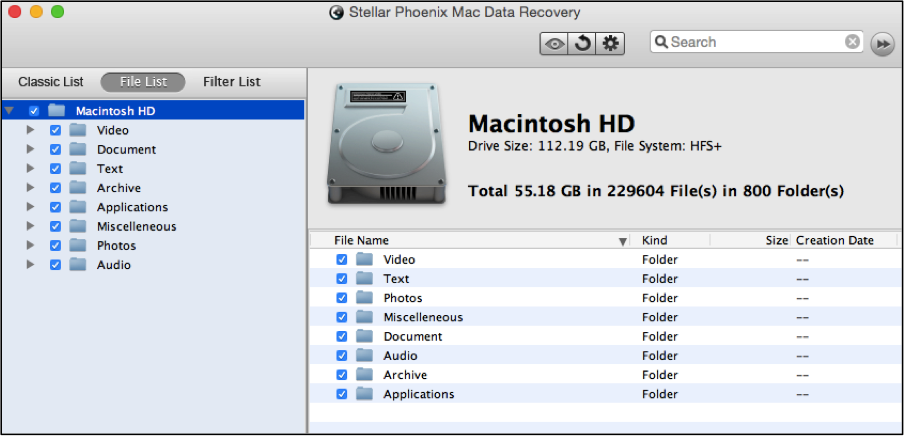
Step 4: Select MacBook Pro Data Recovery Items. Change the current view by clicking on File List at the top left of the application window to simplify the selection process. This provides a simple view for searching through scan results by file type or format. Each file will be organized into folders that show the type (Photos, Archives, Text, etc.) and then its format (BMP, DOC, XLS, MP3, etc.).
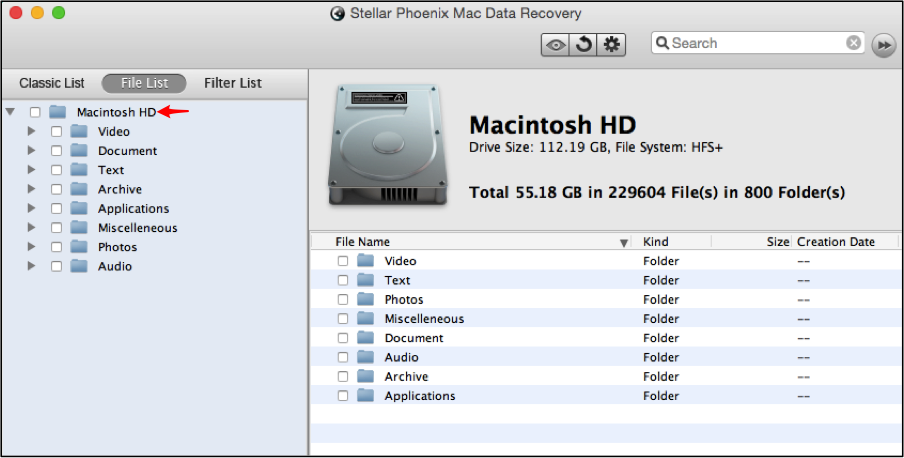
One option for data retrieval is to choose every recoverable file on the drive. This can be done by clicking on the volume name displayed at the top of the tree view on the left of the utility. In this example, the volume is named Macintosh HD.
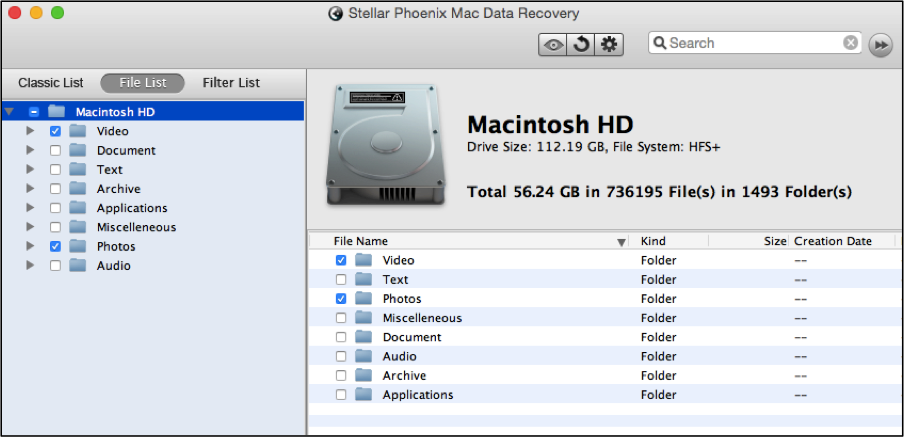
Moreover, one or more types of files may also be chosen on either side of the application window. Each file type contains a checkbox and all you need to do is place a checkmark next to the desired folders. For example, the image below displays the selection of two file types for retrieval.
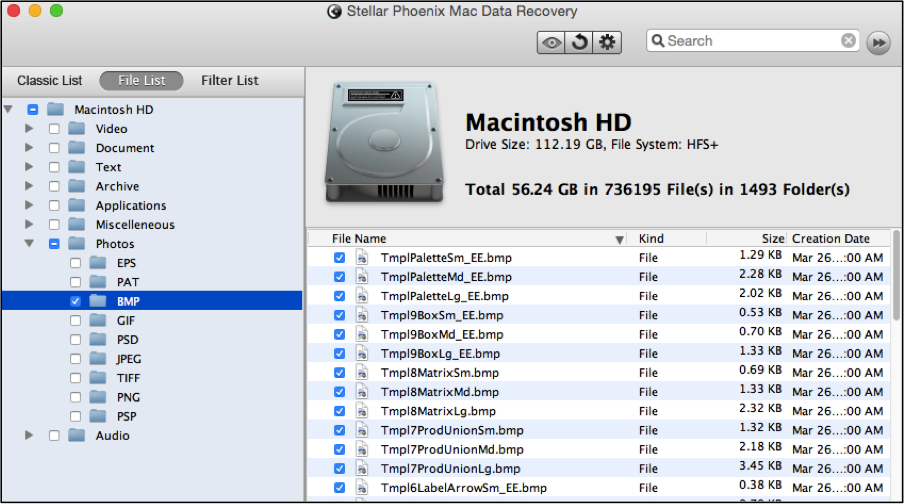
Another option is to only retrieve designated formats such as specific document or audio formats. First, expand the view on the left and then check the box within each subdirectory for the format/s you would like to recover. The following example shows how this would look when the Photos directory is expanded and a format has been chosen.
If only a few files must be retrieved, expand the format folders within the tree view and then tick each item you want to include as part of file recovery. The example below shows four items chosen within the DOCX folder in the tree view.

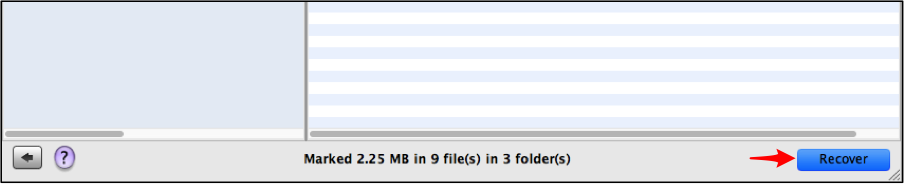
Step 5: Complete MacBook Pro Recovery. This process is not actually finished until you click on Recover within the selection window.
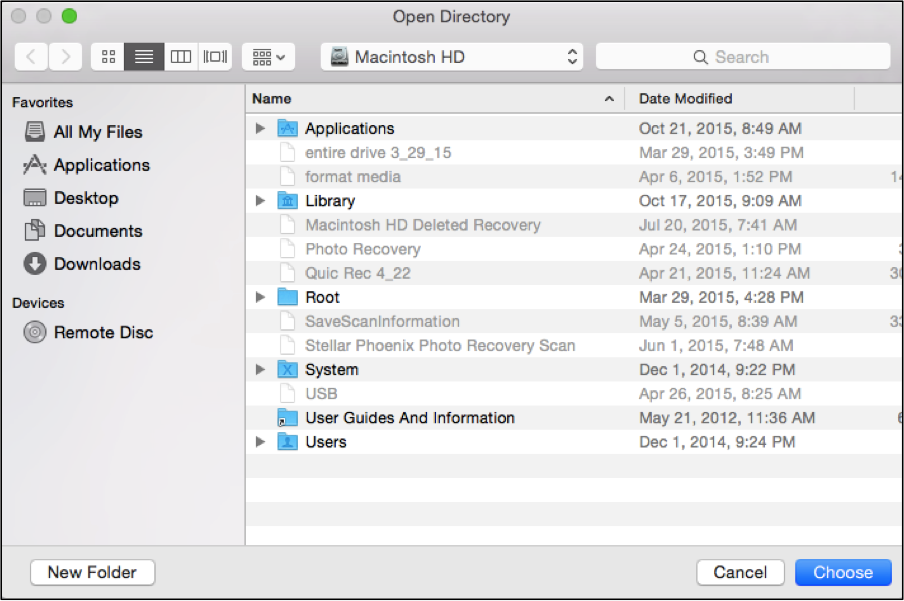
Next, choose a location to save the Root folder created by the utility for storing these items. Once a selection has been made, you will need to click on Choose to finish data recovery.
Whether you need every item on your hard drive, just a handful or single files, Stellar Phoenix Mac Data Recovery will easily deliver the right results. These five steps are all that is required to effectively retrieve files:
- Make a drive selection.
- Pick a retrieval method.
- Complete scanning.
- Choose any required files or types.
- Select a save location on the Macbook Pro.