Mac PDF Files Recovery
Mac PDF Files Recovery: A Simple Solution is Available
Lost or deleted PDF files on a Mac can be troublesome; however, it is possible to get these items back with the proper tool. Deleted PDFs remain on the physical drive until new data needs to be saved to that specific location. This could take a few hours to months depending on available drive space and other factors. This means you can retrieve the data even if it cannot be found or opened by the operating system.
A recovery tool is your best option for a successful Mac PDF file recovery from your computer or connected external storage media. These applications scan the selected storage media to track down files that still reside somewhere on the physical storage. If PDF files have recently been removed or lost due to an unexpected event, a recovery tool may be used to locate this data and recover it.
Stellar Phoenix Mac Data Recovery is able to scan the local hard drive on your Mac or several types of external storage devices to find PDF files. Essentially, the utility will scan the selected drive to find any recoverable data. After scanning, you will be able to do the following:
1. Preview the results
2. Search for specific PDF’s
3. Make custom recovery selections
4. Preview each found PDF file
5. Save PDF’s to a chosen location
Before you can get started, the first step will be to install Stellar Phoenix Mac Data Retrieval to your computer. If the PDF files reside on an external storage media, it will need to be connected to the computer before you can begin. Once these steps have been completed, you can follow the tutorial below and retrieve PDF files in just a few minutes.
Embarking Down the Path to Recovery
Make certain you have installed the appropriate version of Mac Data Recovery, connected any external storage, and opened the application before completing the tutorial. After opening the utility, you will need to click on Start New Scan to begin.

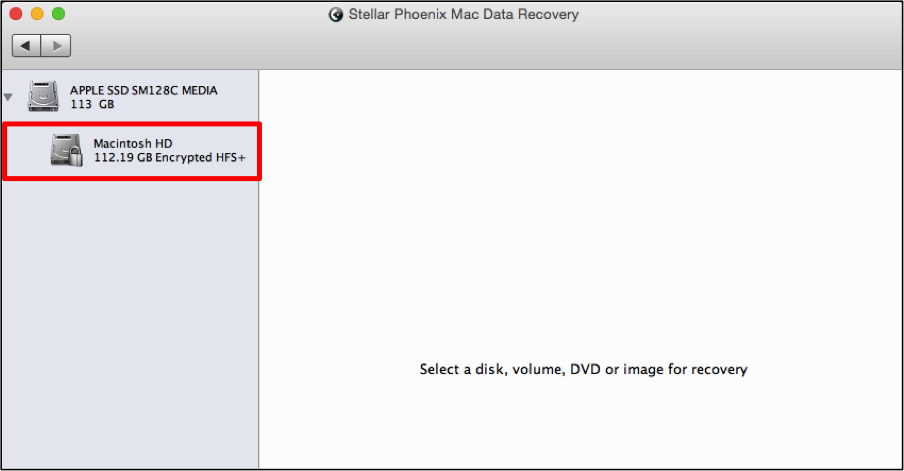
Step 1: Choose a Drive or External Storage. The options shown for drive selection will depend on what type of storage you want to recover from and what is currently connected to the computer.
For Mac computers, the local drive is typically shown as Macintosh HD and will be chosen for this tutorial. However, external storage could appear with a given name or a drive letter such as E:\. Click on the appropriate drive or media in the left panel to make a selection.
Step 2: Choose a Scanning Method. Next, you will need to choose what type of scan will be performed by the utility. Recover Data option is best.
Click on this option to select it and then make certain Quick Scan is selected in the right panel.

Step 3: Scan for Recoverable PDF Files. Stellar Phoenix Windows Data Recovery will scan the entire drive or selected storage media for retrievable files. To begin scanning for files, you will need to click on Start Scan at the bottom right of the utility window.

Note: If the quick scan does not find the files, try completing an ‘Advanced Scan’.
Scanning will take a little time and the screen will show the progress of your scan. A prompt window will appear to show that this process has finished. Click on OK to begin reviewing the results.
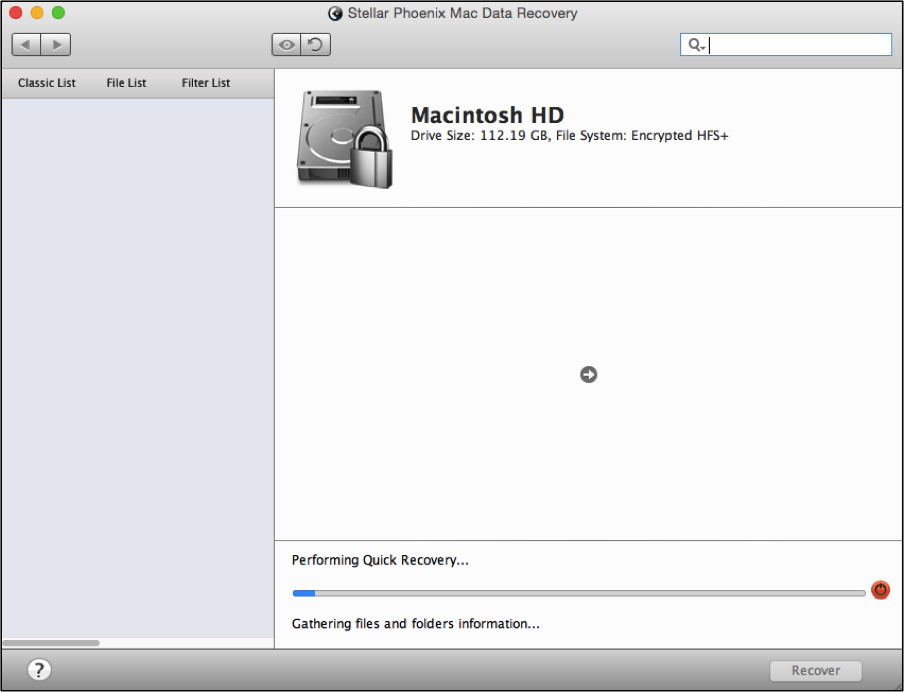
Note: If you need to abort the scan for any reason, just click on the red circle to the right of the progress bar.
Step 4: Regain All or Custom PDF Selections. At this point, you will now be able to view the scan results. However, the default organization is by save location. To make finding your PDFs easier, click on File List above the folder tree.
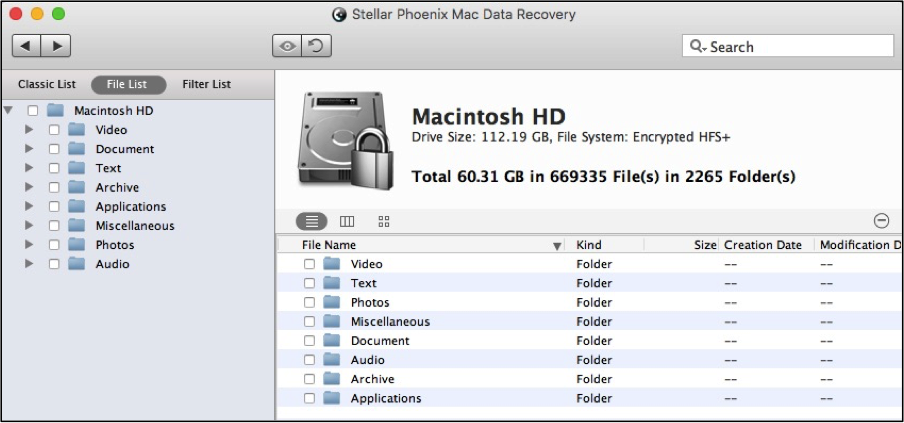
Now each file will be organized by type including Documents, Video, Audio, etc. If you click on the down arrow to the left of Document in the tree view to expand this folder, you will be able to see each format found during scanning.
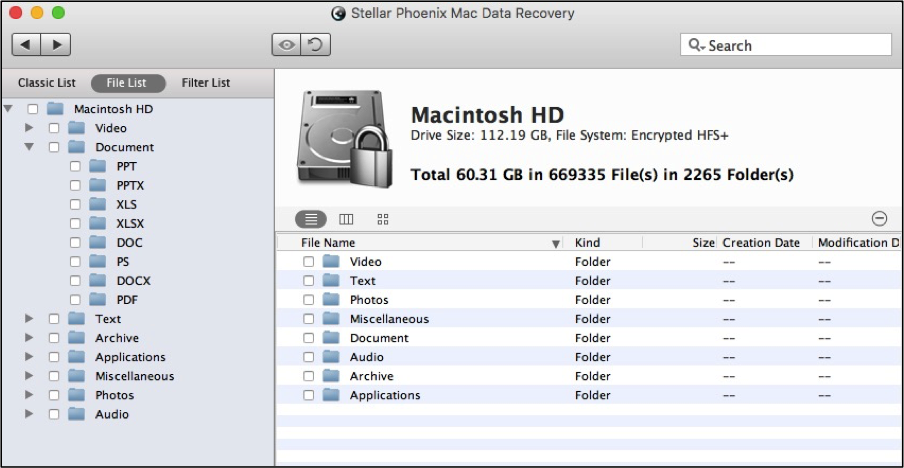
To recover all PDF files found during the scan, click on the checkbox next to the PDF folder in the tree view.
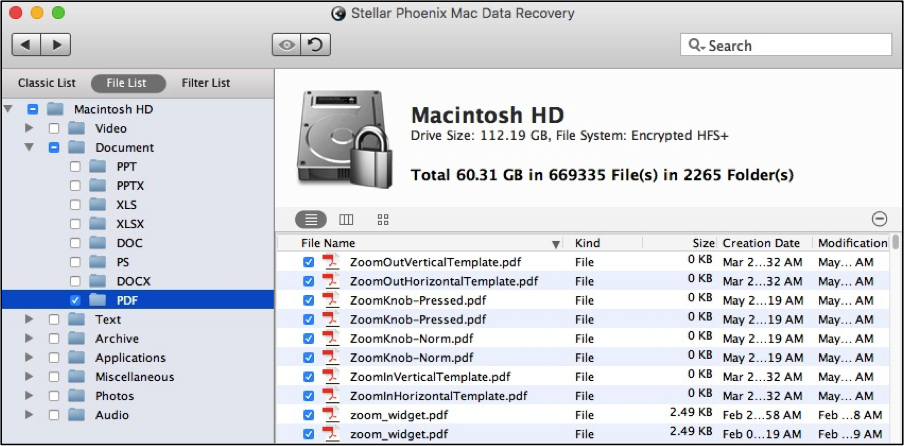
To make more customized selections, click on the PDF folder and each individual file will be displayed to the right. Check the box next to each file you want to retrieve from the scanned drive or storage media.

Note: You can double click on a file to see more information and even preview it before selecting it for recovery.
Step 5: Safely Recover and Save Your Files. Before the files can be recovered, you will need to click on Recover and choose where the data should be saved. Once a save location has been configured, Windows Data Recovery will finish the file retrieval.

Stellar Phoenix Mac Data Recovery offers a simple, user-friendly tool for regaining any lost or deleted PDF files. With it, you can choose to recover an entire drive, all PDF files, or even specific individual files. To successfully complete Mac PDF file recovery after installation on your Mac computer, perform the following steps.
1. Choose a drive or external storage.
2. Choose a scanning method.
3. Scan for recoverable PDF files.
4. Regain all or custom PDF selections.
5. Safely recover and save your files.