Seagate Data Recovery Mac
Seagate Data Recovery Mac: Need a Retrieval Option on Your External Drive?
Do you use a Seagate drive to manage important files, images, or other data? While these drives are highly dependable, regardless of the drive’s renowned performance, the risk of a lost or removed file is just as high as with any other device. Having a dependable option for Seagate data retrieval Mac is essential to ensure a backup method is in place when the unexpected happens. The right retrieval program can ensure you are able to retrieve information in any detrimental scenario.
Stellar Phoenix Mac Data Retrieval is an application designed to retrieve files at times when files has been inadvertently removed or cannot be located by the operating system (OS). As an example, loss of power often results in the hard drive being damaged or files becoming corrupted. If no recovery tool is available, this information might get overwritten on the drive and will be difficult to retrieve. With Stellar Phoenix Mac Files Recovery, it will be able to locate the information as long as the drive can be connected to a Mac.
Moreover, this recovery utility performs a scan on your Seagate storage device to locate any information that cannot be found by the OS but still exists on the drive. It may be used to locate various file types on your Seagate device including documents, videos, and photos. The files cannot be found on the drive because the save address has been removed from the lookup table. In some cases, the entire table might be corrupted.
To retrieve files from your drive, first install Stellar Phoenix Mac Data Retrieval and then perform a Quick Scan Recovery. In most scenarios, this retrieval option will able to restore anything you need from a connected Seagate drive. The tutorial below discusses the steps you need to perform Seagate Data Recovery Mac.
How to Get your Files Back
Before the retrieval process can begin, the utility must be running and your Seagate drive will have to be connected to the computer. In the main application window of Stellar Phoenix Mac File Retrieval, click on Start New Scan.

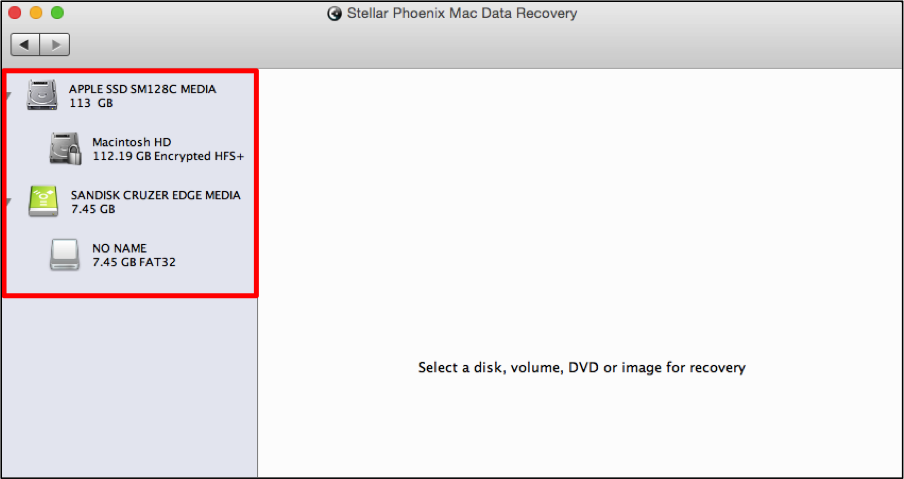
Step 1: Once the Seagate device has been connected, either the name of the drive or “No Name” (when none has been assigned) will appear in the left panel. First, select the Seagate drive to be scanned on the left side of the utility.
Step 2: Next, you will need to choose the type of file retrieval and scan that will be performed by Macintosh File Retrieval. The retrieval mode tells the utility how the files should be located on the connected drive. For this tutorial, we will be showing how to complete a Quick Scan Recovery.
To do so, just click on Recover Data, as the Quick Scan option is already the default choice.
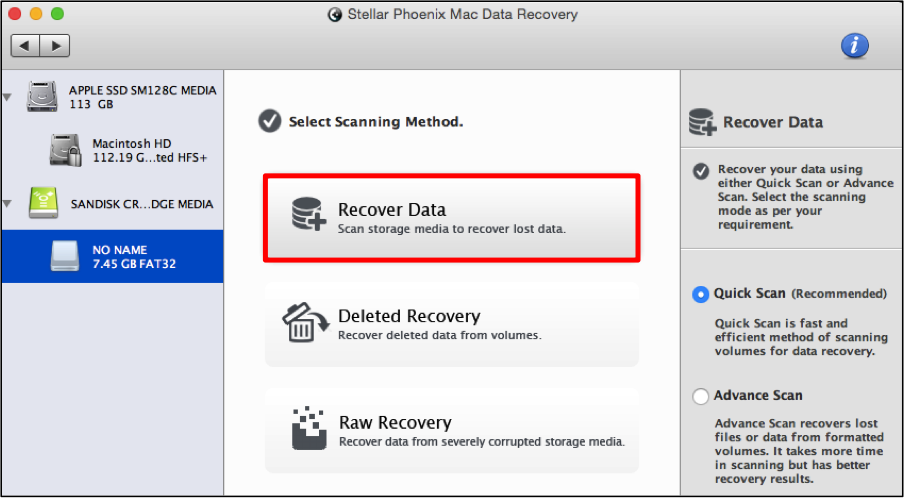
The Quick Scan option takes less time and in general will find any removed or lost files on the drive. After selecting the recovery mode, click on the Start Scan button to continue.

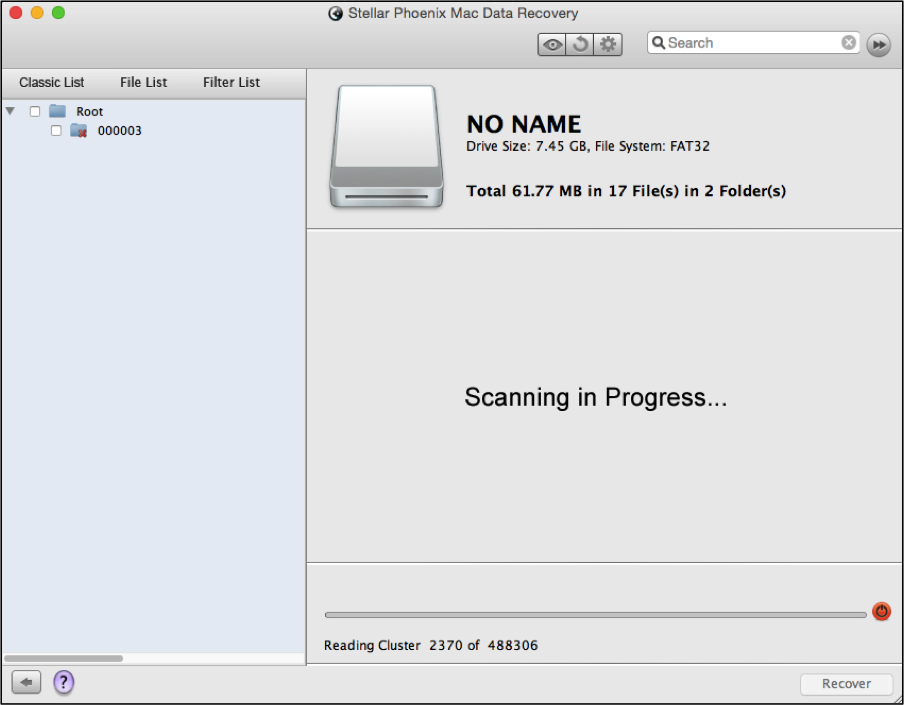
Scanning will now begin. An abort button (red circle) resides next to the progress bar and can be used to stop scanning. You will need to click OK within the confirmation message once the process has finished.
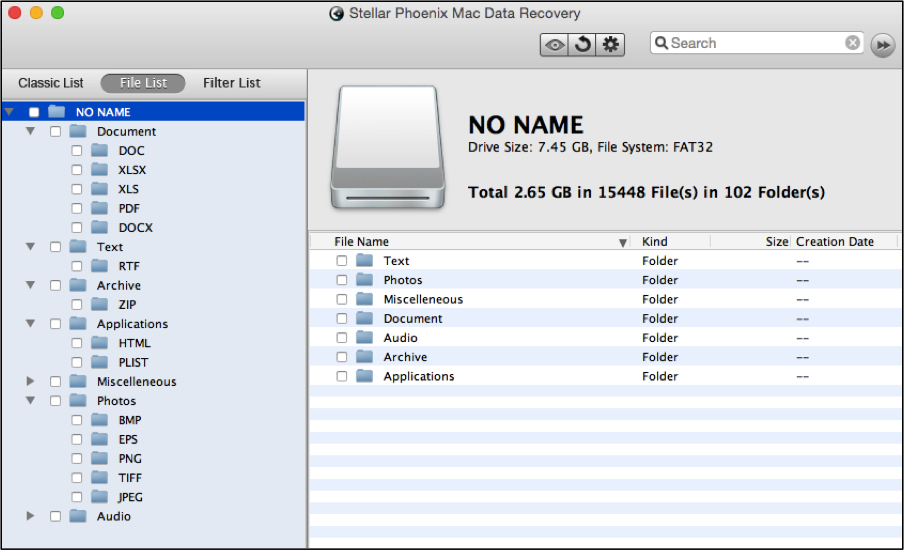
Step 3: The utility will display every file located during the scan. Click on File List above the tree list of directories prior to reviewing the files. This option will change the view to a tree of file types and formats for easier viewing.
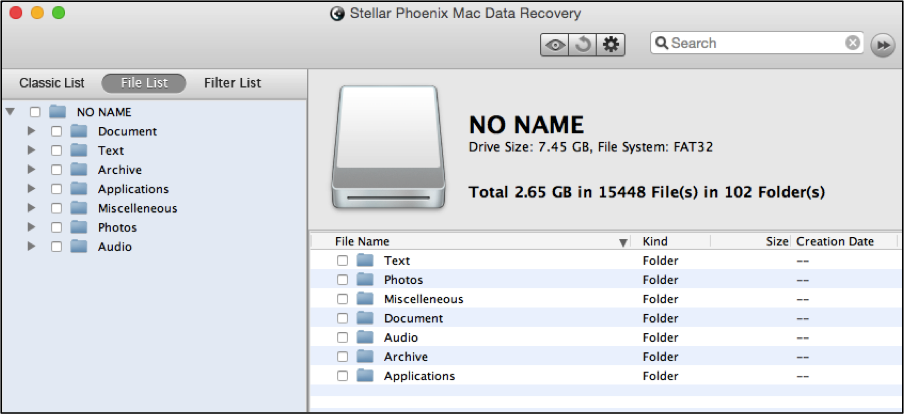
To expand a section, just click on the down arrow next to each desired item in the tree view. This will display each format available in the directory.
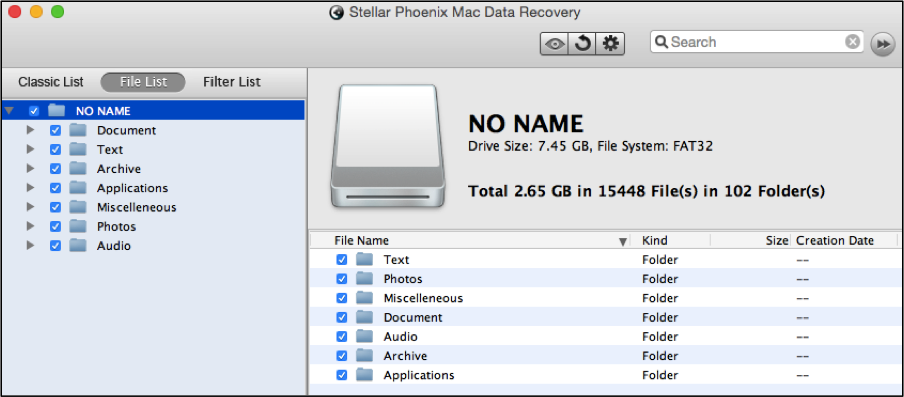
Placing a checkmark next to the Seagate drive name on the left of the screen will result in all files being selected for recovery.
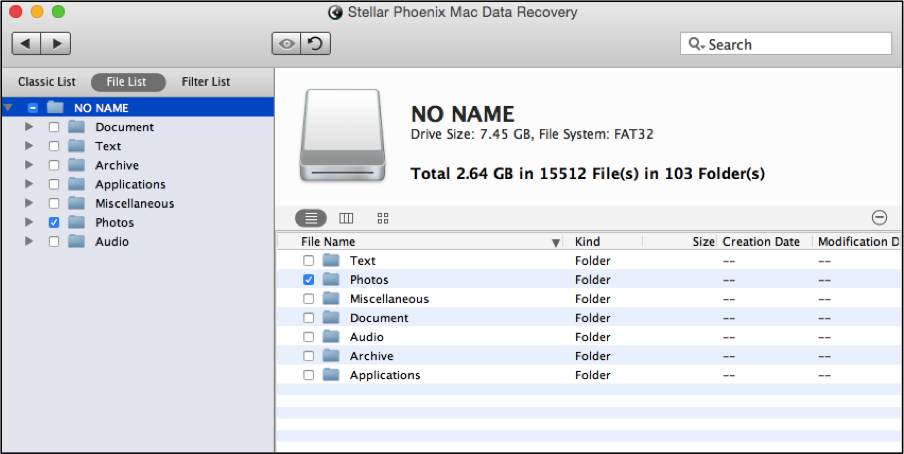
You may choose certain folders by placing a checkmark next to their name. This is the easiest way to restore file types such as documents, text files or audio files. In the example provided below, every photo type will be included as part of Seagate data retrieval Mac.
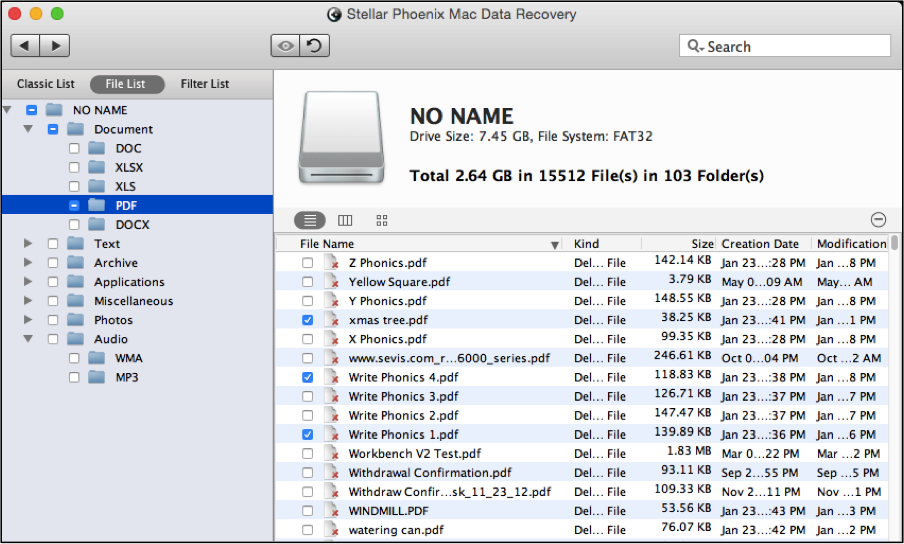
One or more formats may also be chosen by expanding the file type folder (i.e. Documents, etc.) and checking each format to be retrieved. For example, if you expand Documents and choose DOCX, then every Word Document will be included in the retrieval.
When a format folder is expanded such as PDF, all PDF files will be displayed on the right of the window. Individual selections are possible by ticking the box next to each item.
Step 4: When you have finished selecting the files to be retrieved from the Seagate drive, click on the Recover button.
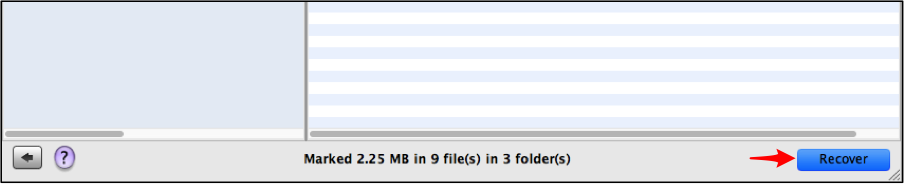
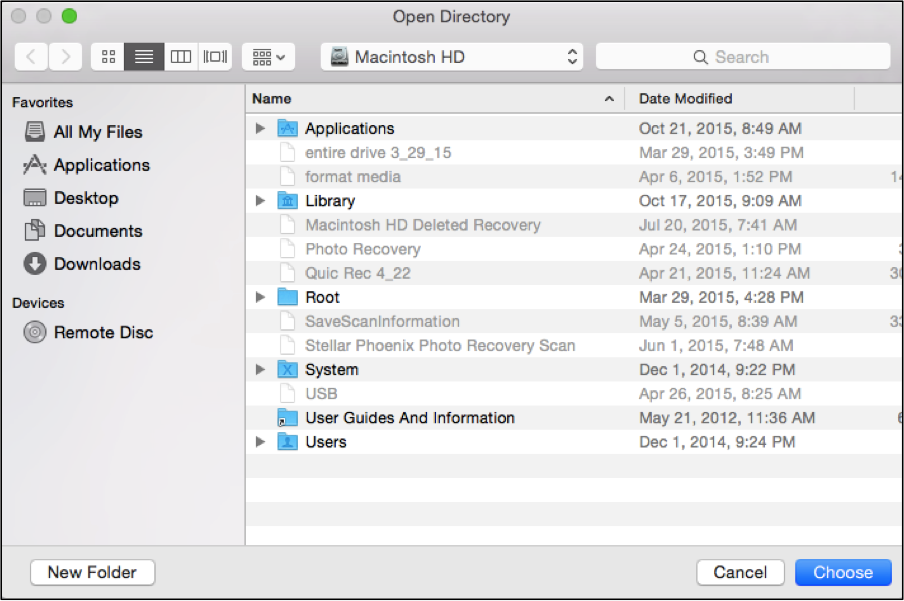
You have to choose then a save location for the recovered files and the utility will complete the process. This information is automatically stored in a folder titled Root within the chosen directory on the Mac computer.
Seagate file retrieval is easy when you use Stellar Phoenix Mac Data Retrieval. Just complete this tutorial by:
- Picking the scanning drive.
- Configuring the recovery and scanning.
- Selecting files to retrieve.
- Finishing the file restoration.
Try it out today to see how easy it can be to perform Seagate file retrieval on a Mac.