MacBook Air Data Recovery
Simple and Effective MacBook Air Data Recovery
Has a MacBook Air recently experienced a problem that left you scratching your head about where the data went? What may seem like the slightest issue can wreak havoc on your computer’s drive. For example, a simple power outage has the ability to wipe out some or all of your files including applications or archived items. Whatever the cause, a recovery program is the best option for a fast, reliable file retrieval.
What is a file retrieval utility and why use it? This software is designed to scan the physical sectors on your hard drive to locate files that the operating system is unable to find within the address table it uses. Each file has an associated address, which is actually removed upon deletion. However, the files remains on the sector where it was stored until new data overwrites it. This creates a retrieval window where you can easily perform file retrieval and in most cases, restore the information before it is actually gone.
Stellar Phoenix Mac File Recovery may be used on several computers including the MacBook Air and operating system versions to locate lost or deleted files on a:
- Primary Hard Drive Volume
- Secondary Volumes
- External Drives & Devices
- Formatted Media
- and More
You can connect a device to the MacBook Air for external retrieval or retrieve data straight from your computer. To begin, complete the software installation process and then open the utility. After which, follow the steps outlined in this tutorial to perform a successful file retrieval.
4 Tasks for Reliable File Retrieval
For this example, a quick scan of the primary volume will be completed. To get started, choose the Start New Scan option and a new screen will open for picking a drive to use for retrieval.

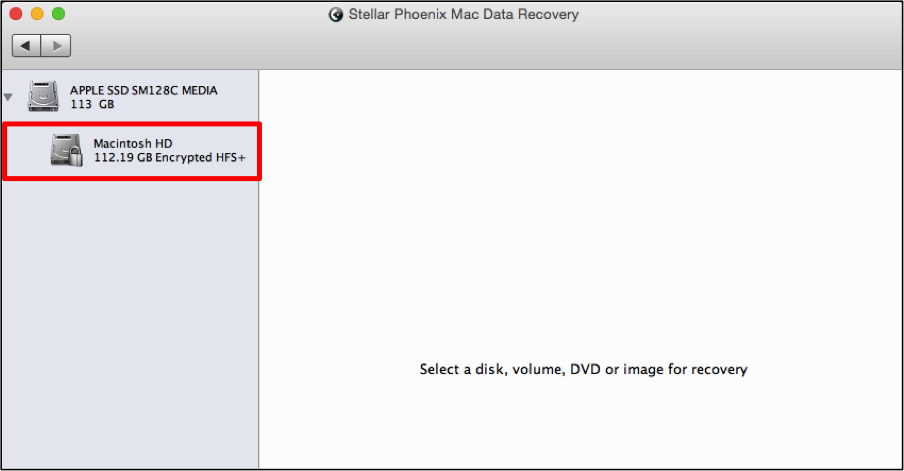
Step 1: The volume where the data is stored must be scanned in order for the files to be retrieved. To choose a volume, click on its name on the left side of the window.
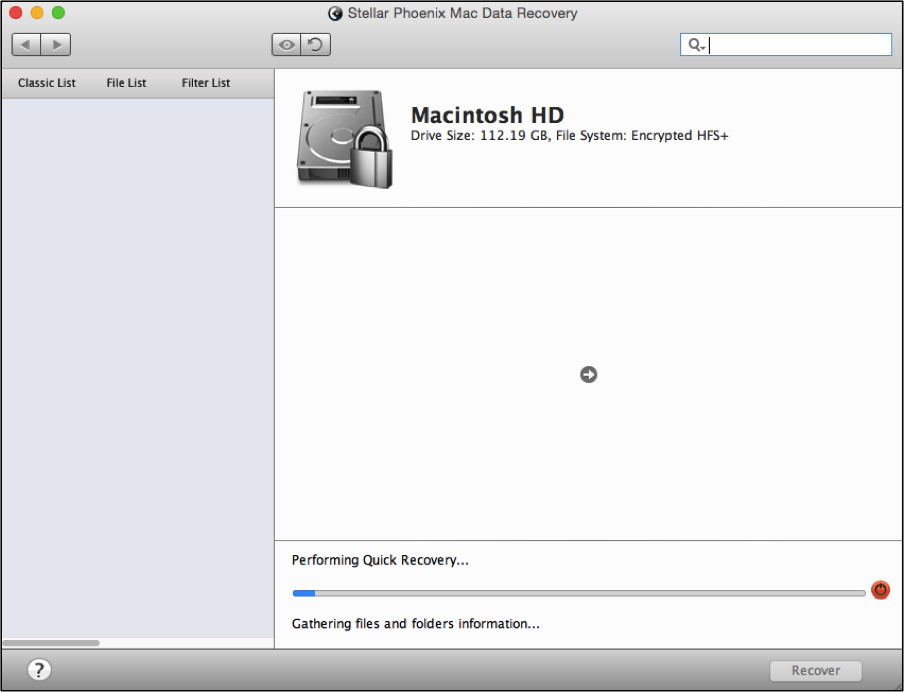
Step 2: A Quick Recovery scan is the easiest, fastest option for locating lost or deleted files. Click on Recover Data, make certain the Quick Scan option has been selected, and then click on the Start Scan button.

(Do note that not all files will always be retrievable especially if you have been consistently making changes on your laptop. For the best results, immediately stop working on the computer and perform these steps with the Mac Data Retrieval utility.)
As the utility scans for retrievable files, you will see a progress bar continuously advance at the bottom of the screen. You can click on the red circle to the right of this bar at any time to pause a scan.
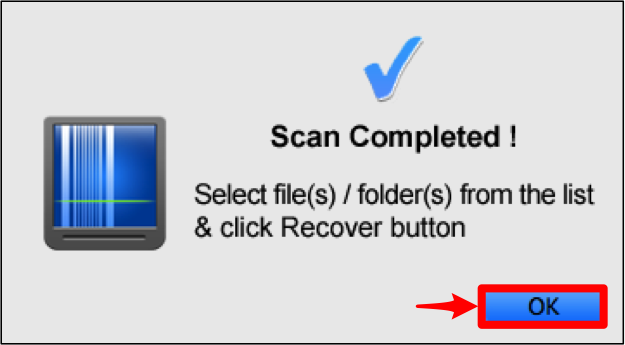
When the scan has completed, click on OK to close the provided confirmation message.
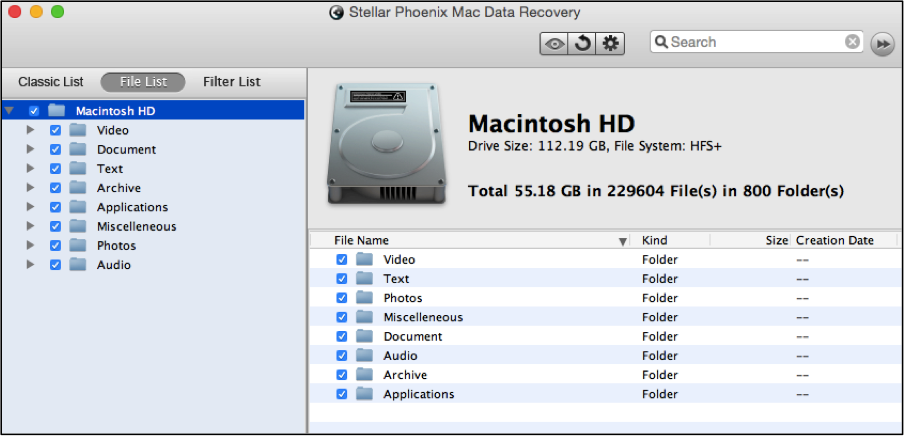
Step 3: Before making selections, it is recommended to click on File List at the top of the tree view to view results by file type. The Classic List (default selection) is based off of the files initial save location and can sometimes make it difficult to find specific files or file types.
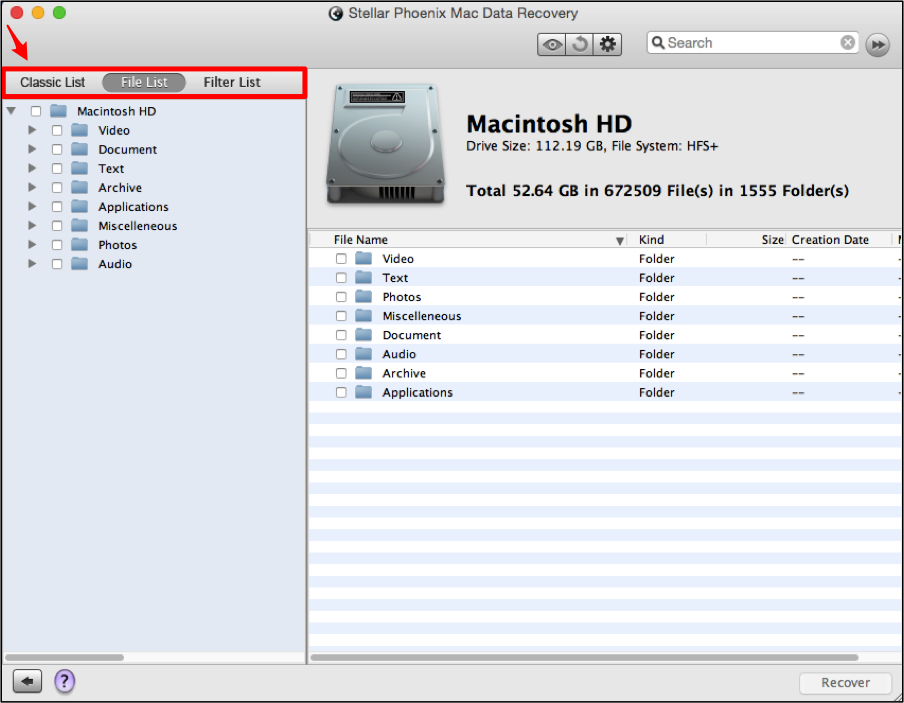
If the goal is to restore all files from the MacBook Air, simply check the box located to the left of the volume that was scanned. This will select every file located during the scan for retrieval.
You may also check certain file types for retrieval and only the selected choices will be restored. In the following example, Video and Photos have been selected.
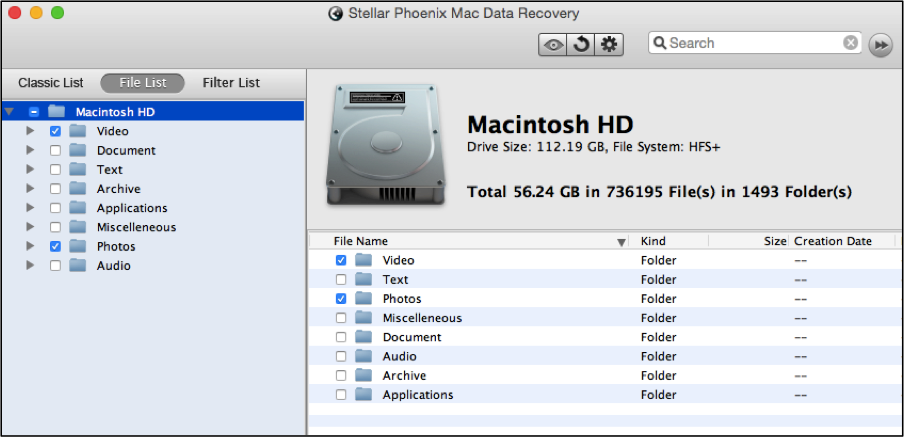
Moreover, when the checkbox for a specific format is chosen, every file for that format is marked for retrieval.
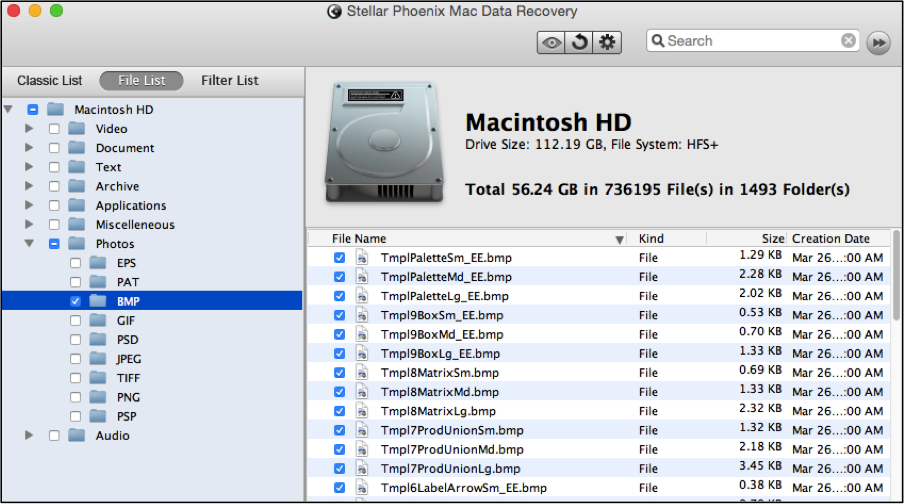
Another option is to click on the folder name and make single file selections on the right hand side of the utility. For example, you can click on DOCX underneath Documents in the tree view and then select each document file you want to restore.

Step 4: If you are done selecting the desired files, directories, or volume, it is now time to proceed with the recovery. To do so, you will need to click on Recover found at the bottom of the window.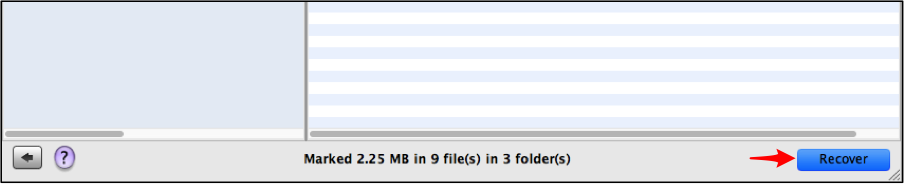
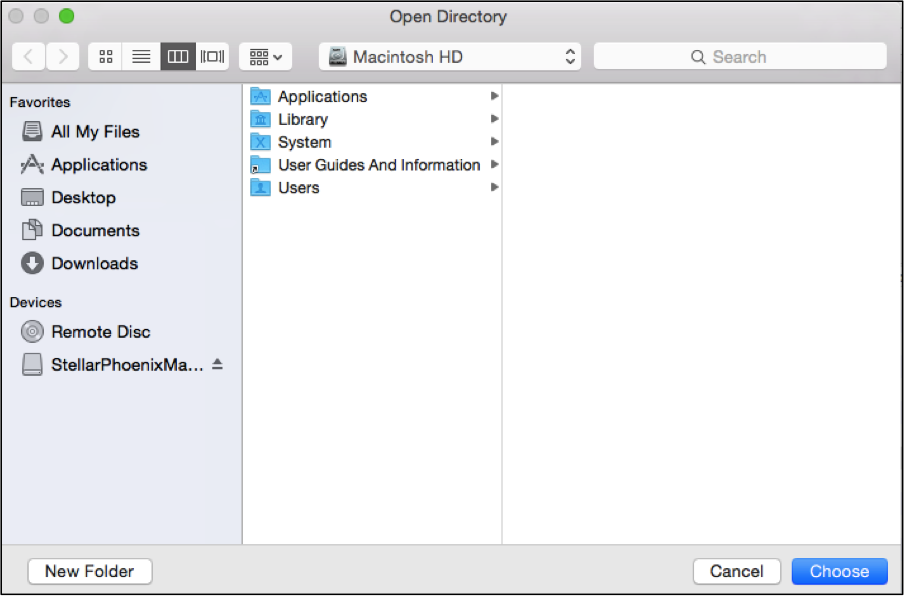
Before MacBook Air file recovery may be completed, you must select a directory for the retrieved files to be stored. Click Choose and the selections will be recovered and saved in a Root directory within the chosen location on your computer.
Now that you know what a Mac File Retrieval utility is and how easy it can be to restore files, it is essential to keep this software handy. By completing these 4 simple tasks, any items may be recovered.
- Pick a volume.
- Set the recovery mode.
- Scan the computers drive.
- Choose and restore the files.
With Stellar Phoenix Mac Data Retrieval, you are well on your way to data freedom! Regardless of what has happened, files are completely retrievable on a MacBook Air with the Quick Scan option.