Using Apple Pay on Mac
Using Apple Pay on Mac: The Most Secure Payment Processing Available
So you are looking into using Apple Pay on Mac. Say, you are browsing the net.
Suddenly an ad pops up for a beautiful pair of wireless headphones that you had been hankering after for a very long time.
You decide to take the plunge.
You go to the site, add the item to the cart and then comes the arduous part. Fishing out your credit card, taking note of its number, the expiry date and the Card Verification Value code, ensuring everything is filled in without mistake and also wrestling the nagging worry that always accompanies any online transaction – the threat of hacking.
Phew! That’s a lot to contend with.
Almost makes you want to ditch the shopping, right?
And on top of these hassles, the risk of handing over sensitive credit card details to miscreants is a very real possibility.
So what do you do?
Should you give tap or touch to pay applications like Apple Pay a chance?
As it turns out, Apple Pay has consistently resisted all hacking attempts. Experts could attest that this system eliminates the legacy equipment and protocols that online phishers and attackers have mastered and is a new payment paradigm that is a lot harder to crack.
If you happen to own a Macbook, then you can definitely enjoy the seamless and almost instant online transaction facilitation that comes with Apple Pay.
And here’s everything you need to know about using Apple Pay on Mac.
System Requirements
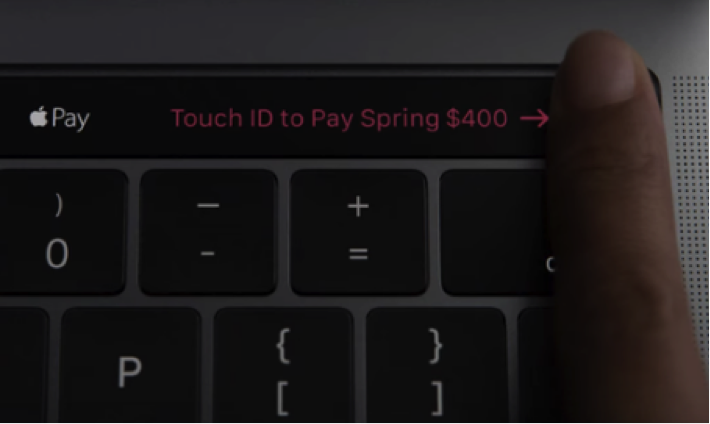
The Macbook Pro has received mixed reviews from its critics. But the one feature that has won everyone over is the Touch ID bar or sensor. It leverages biometrics to ensure that only you can log into your computer. Biometrics is intrinsically less prone to hacking than data or codes. Its imprint is unique to an individual and almost impossible to replicate.
This Touch ID sensor is what helps Apple Pay function in the laptop avatar.

In case you don’t own the Macbook Pro yet, you can make do with an older version of the Mac. In this instance you require two things:
- The Sierra OS (upgrade to this operating system from your existing OS)
- An iPhone or Apple Watch
Adding Your Cards to Your Wallet
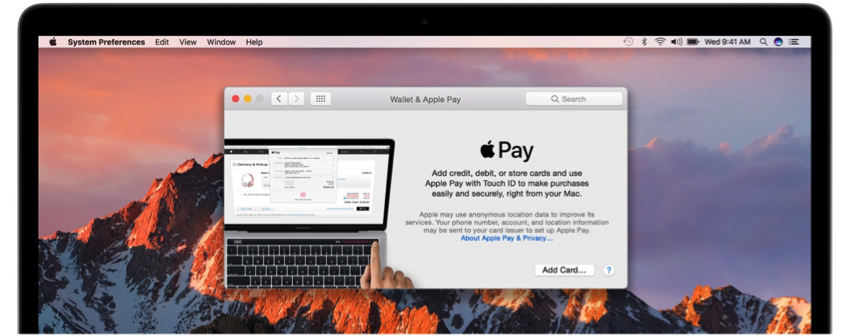
For Apple Pay to do its magic, it must be able to access the credentials from your debit and credit cards to complete the transactions. Apple has a dedicated native application – the Wallet which acts as a secure holder of this information.
1. Head to System Preferences on the dock and choose Wallet & Apple Pay.
2. Click on “Add Card” to initiate the procedure.

3. Input all the details that your bank will need to verify and then activate your card. Sometimes only the basic details suffice and sometimes more is needed. This depends on the bank.
4. Once the information is accepted and validated, tap the “Next” button.
5. You are now ready to start using Apple Pay on Mac!
Completing a Transaction
This is it. You get to test drive your Apple Pay set-up with a transaction.
A caveat here! Not all eCommerce brands accept Apple Pay. More and more companies are including this easy option but there is a long way to go before the touch driven process can be called ubiquitous.
The ones that do go for Apple Pay have the badge displayed prominently during checkout.
1. Find a platform that is Apple Pay compatible and fill your cart.
(We recommend not building up a grand total the first time you play with the system. This will have your back in case the transaction doesn’t go as planned)
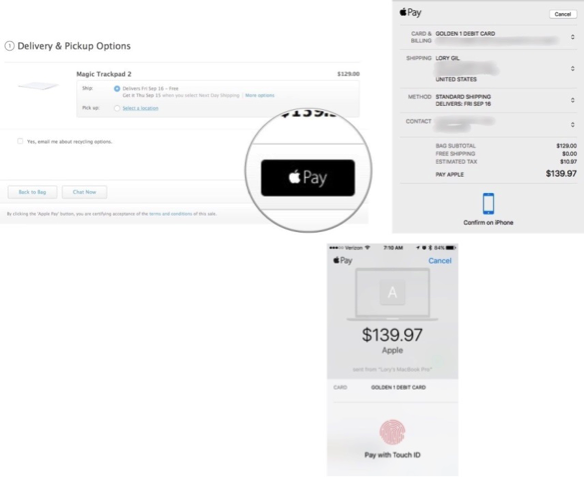
2. On the checkout page, click on the Pay with Apple Pay button.

3. When prompted, place your system registered finger on the Touch ID bar. Make sure there is no residue like sweat or grime on your fingertip. This often draws a blank.
4. When the transaction goes through, you will get a confirmation. Basically it is your touch (or skin contact) that authorizes the payment.
5. In case you don’t have the Macbook Pro, when prompted to initiate contact, do so by placing your system registered finger on the Home button of your iPhone or by pushing the side button of your Apple Watch. Both actions should achieve the same result of completing the transaction.
The iTunes store and the Apple Store haven’t integrated the Apple Pay functionality yet which is rather ironic. But it is a wise move to join the secure payment bandwagon and make the “touch” a habit. The ease of the deed might push you to shop a lot more.
But hey, if you are willing to take that chance, Apple Pay is about the best and the safest set-up out there.
