Recover Crashed or Corrupted Hard Drive Mac
How To Recover a Crashed or Corrupted Hard Drive on a Mac
Has your hard drive recently crashed or become corrupted resulting in loss of information? Yes, these events are frustrating. But unless the crash is due to a read/write head physically causing damage to the platter within the drive, your lost data may still be retrieved with a reliable recovery tool. It can crash due to issues such as frequent overheating, circuitry problems, and improper head alignment. Corruption could be the side effect of a virus or problem on the partition.
It might seem like your files are permanently lost, but a dependable retrieval utility can regain this information fairly quickly and gets you right back on track. These tools are designed to scan the physical drive and retrieve any files that have been deleted or lost due to issues. This data cannot be located by the operating system because the access information has been removed from or is corrupted within the address table. The files still reside on the drive, but the OS is unable to locate them.
Introducing Stellar Phoenix Mac Data Recovery
Stellar Phoenix Mac Data Recovery is a tool you can use to recover crashed or collapsed hard drive Mac. This utility will scan the it for retrievable data and will save all or just your selected files to a designated location on the computer or an external drive. Stellar Phoenix Mac File Recovery offers these data retrieval options:
- Scan a partition or entire drive
- Restore all contents
- Restore selected files
- Save the results for later use
- Recover a physical drive
- Retrieve files from an external drive
- Change the view and search for files
Mac Data Recovery software offers more than one retrieval mode to ensure you can regain important data from a crashed or corrupted hard drive Macintosh. Some modes are designed for specific file types or media. The following tutorial will show how to perform a Quick Recovery with the utility for fast restoration of data after an unexpected crash or corruption.
How to Retrieve Your Entire Drive
So a recent crash or corruption has wreaked havoc on your data and it seems to just be gone. With Mac File Recovery, it is easy to salvage lost information from a crashed or collapsed drive on your Macintosh. For external ones, you must connect them to the Mac where the utility was installed. Then complete the following steps, as shown by the tutorial provided below, to retrieve your files.
Step 1: Click on Start New Scan on the main application window and this will take you to the options for data retrieval.

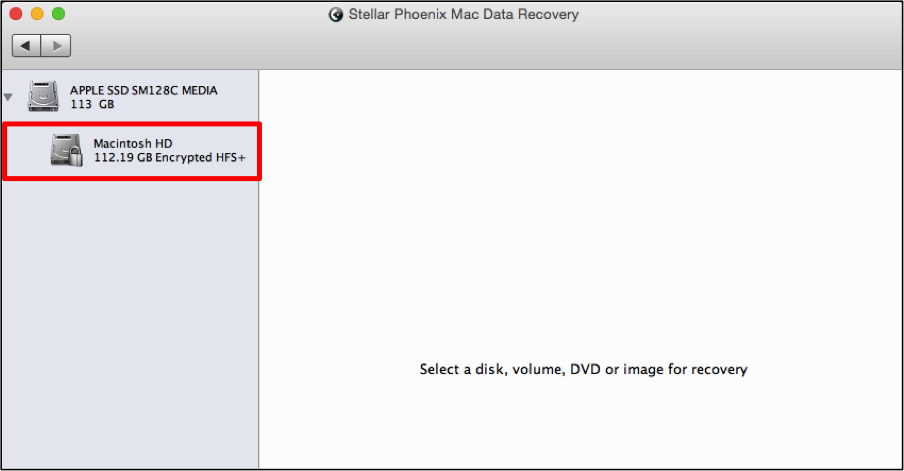
Choose the appropriate drive for scanning. After making a recovery mode selection, available volumes for data retrieval will be displayed on the screen.
In the provided example, the primary volume and the recovery volume are shown. If it is external, it will either appear in this window with the name you have assigned to it or as “No Name”.
To make a selection, click on the name of the volume you want the utility to scan.
Step 2: This tutorial shows the steps for completing a Quick Recovery scan, which will perform a rapid scan for retrievable files. Other modes are available in instances where this one does not find the data you need.
Click on Recover Data and leave the Quick Scan option selected to initiate a scan of the crashed or corrupted volume.

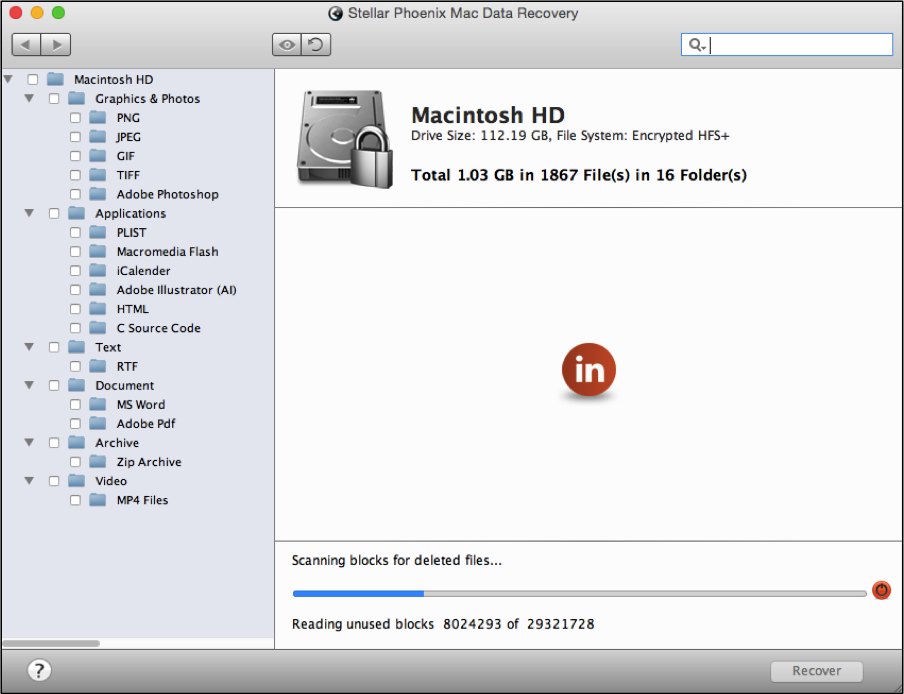
You will then need to click on the Start Scan button for the utility to search for retrievable files on the chosen volume.

Scanning will only take a couple of minutes to complete and you will need to click on OK when the confirmation message is provided. The following image shows how the utility will look as scanning takes place:
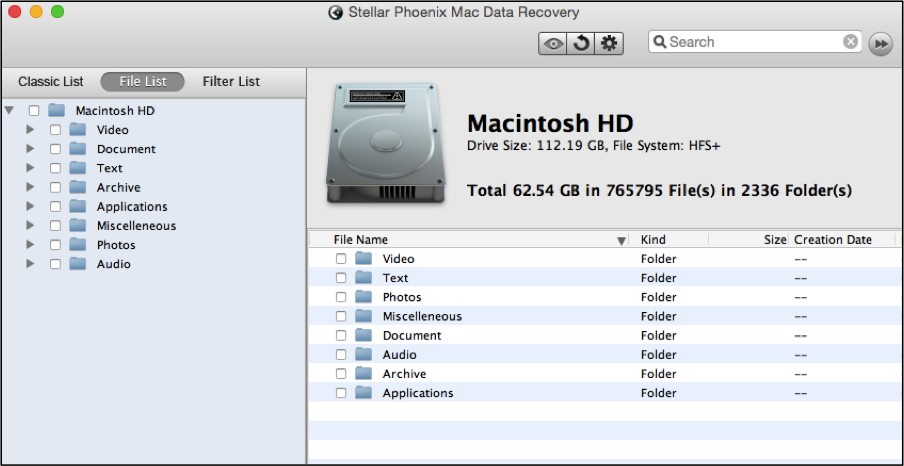
Step 3: Switch to the File List view to make it easier to view the results. The utility displays scan results based on where they were saved. By doing so (switching from the default view), the result of the scan will display located files by type, format, and name.
Step 4: Next, click on the checkbox next to the volume name to select all files for recovery.
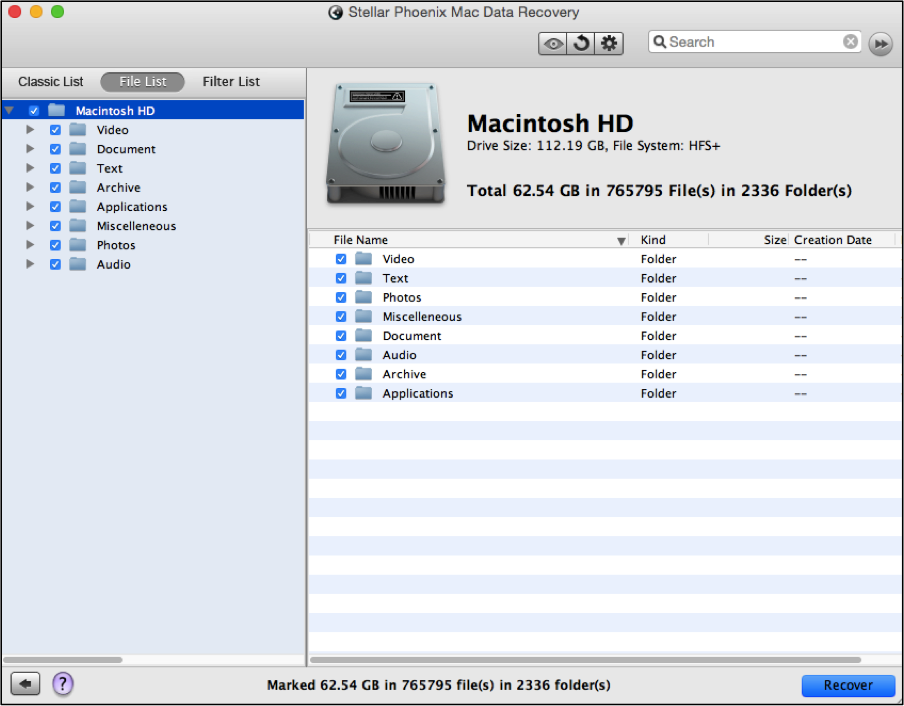
Please note that you may expand folders in the tree view to see formats as well as click on a specific format to make individual file selections. To make a selection, place a checkmark in the box located to the left of the item or folders name. You can eliminate a selection by clicking on an item’s checkbox to remove the check mark.
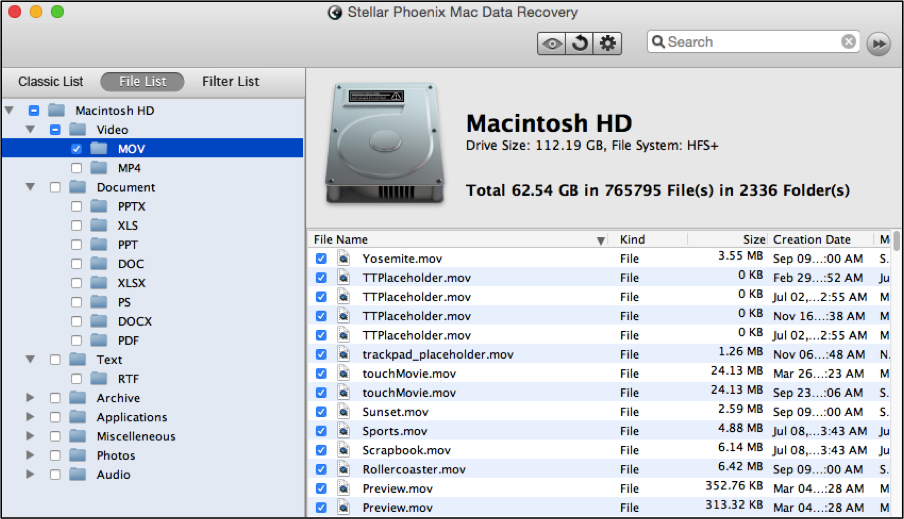
For this tutorial, we are simply restoring everything on the crashed or corrupted drive. These steps may need to be performed again if more than one volume resides on the drive for file storage.
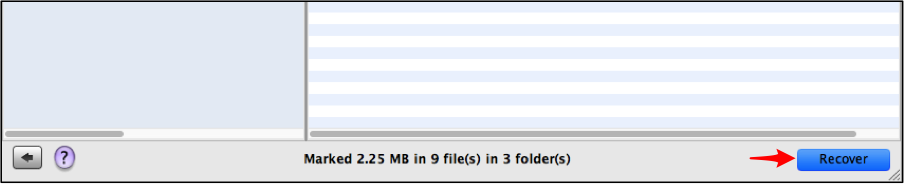
Step 5: To finish, click on Recover located at the bottom right of the screen after selecting the entire drive for file restoration.
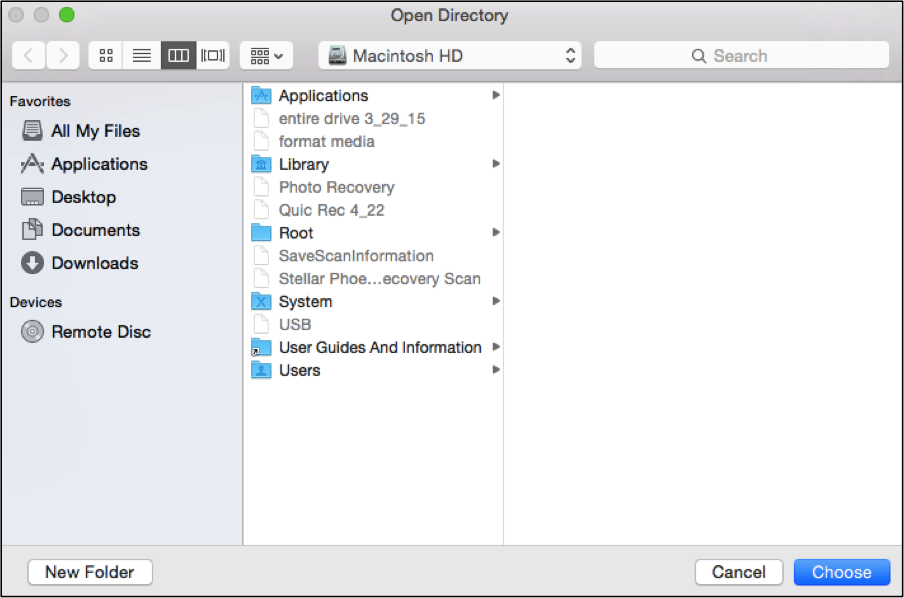
Pick a save location for the retrieved files and the software will store these files to that location in a folder titled Root. The save location may be on the Macintosh computer used for scanning or even on an external drive that is connected to the computer.
Once finished, just click on Choose and Mac Data Retrieval will handle the rest.
As you can see, in just a few clicks, the files from your crashed or corrupted drive will be accessible and viewable again. Only a few minutes are needed to complete this process with Stellar Phoenix Mac Data Recovery. If you need to recover crashed or corrupted hard drive Mac, these five steps must be performed with the utility:
- Choose a drive to scan.
- Configure the recovery mode & scan.
- Change the view to File List.
- Select the volume for recovery.
- Click on Recover and choose a save directory.