How to Free Up Storage on Mac
How to Free Up Storage on Mac: 5 Tips that Always Work
Mac users swear by the power, flexibility and speed of their Apple devices.
But despite all the bells and whistles that Mac OS equipped laptops and computers come with, a limited space solid state hard disk can only go so far in terms of storage. Whether you are a streamlined Apple evangelist with just one disk partition or a power user with multiple disk sections, knowing some effective storage and clean up tricks goes a long way in assuring that you don’t have to suffer from errors or disk space warnings that disrupt your productivity.
Here are five ways to enjoy more space on your Mac:
Tip #1: Remove Duplicate Files
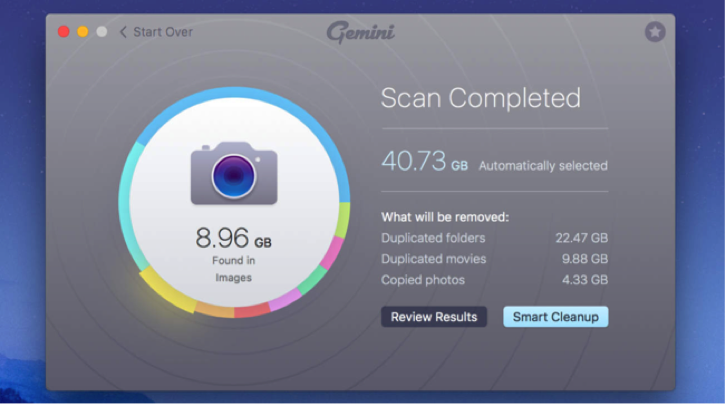
Has your device been with you since biblical times? Then it goes without saying that the storage disk is a labyrinth only you can navigate. Do you know just how many duplicate files (documents, media files like photos and videos) are littered across partitions? A good way to give your hard disk breathing space is to find and eliminate these data bytes. You can either do this manually (if you have a lot of time to kill) but if you are rushed and needed optimal performance from your device, you should invest in an app that does so automatically. Gemini 2 comes with a slick interface and is really good at what it does.

Tip #2: Empty All Trash Cans
This one is a bit of a curve ball. Mac users regularly empty the Trash can on their dock because it is a golden rule of storage optimization. But do you know that native Mac applications like iPhoto, iMovie and Mail have their own bins to empty? You can find them by simply firing open the application, clicking on “Trash” and right clicking to pop the option “Empty Trash”.
A related bit of advice is to jettison large attachments from the OS Mailbox. If you have processed the emails and their documents, you might as well delete them from the system. Unlike the browser based Gmail, the native email app directly stores data to the hard disk.
Tip #3: Clean Application & OS Temporary Files
Temporary files are generally used to facilitate a very specific or particular task. They are generally generated by your Mac OS itself and the apps you install to enhance your user experience.
It is difficult to locate these temporary files but a small and mighty solution – the CCleaner for Mac does it for you. It removes what is not needed safely and quickly providing you considerable storage space gain.
Tip #4: Make Use of the Cloud
This is a mega tip comprised of three strategies in one. When the infinite potential of the cloud is at your fingertips – why should you deal with the hassles of diminishing storage space like it is the early 90s?
There are a number of ways in which the cloud can come to your rescue.
(i) Selectively Synchronize Dropbox Files: If you add something to your Dropbox account, it is, by default, stored on your Mac hard disk as well. This is because Dropbox serves the primary purpose of having a backup platform. But we can turn the nifty application into a huge space saver by choosing the folders that do synchronize with your device hard disk. Open up Dropbox, click on “Preferences”, choose the account that is relevant and tap “Selective Sync”. Now you can literally dictate what stays only in the cloud and what has a copy in your system as well.
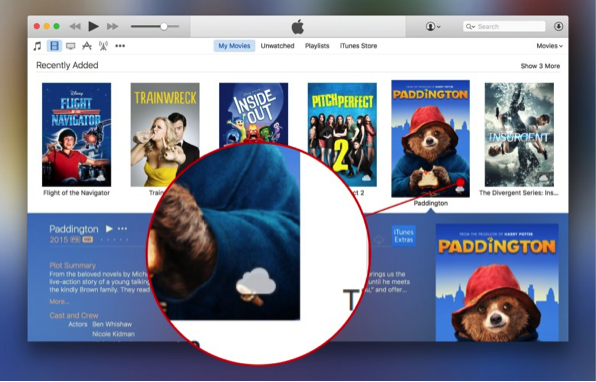
(ii) Stream Media Through iTunes in the Cloud: Let’s say you have purchased half a dozen seasons of your favorite show and at least 20 movies from the online marketplace. What do you do with this loot? Do you create a hard copy of each and every item consuming all your storage space? No! You download the ones you would like to watch offline to an external device and stream the rest through the cloud by clicking the tiny cloud icon next to the content.

(iii) Saving Photos & Videos to iCloud: Why leave the iCloud space unused? Media files like images and videos overwhelm your hard disk. And to be frank, you don’t need everything in your system anyway. Just offload these large and often “strictly for entertainment” items to your iCloud account and access them when you are connected to a Wi-Fi network.
Tip #5: Say Goodbye to Unused Applications
A classic strategy that never disappoints!
A savvy Mac user collects a lot of app baggage.
If you haven’t been using an application for 6 weeks, you likely don’t need it anymore. Browse your Applications folder and sever the ties with the ones you don’t see yourself firing up any time in the near future.
You might also delete the language files associated with the apps you do use so that only the English version of the interface is available for loading.
Are these the only five tips out there how to free up storage on Mac? Certainly not. But most strategies are a variation of these good old principles. Start out with them and you will never see the “Disk Full” warning message again.
