USB Recovery for Mac
USB Recovery for Mac is Only a Download Away
If you need to retrieve files from a USB storage device, it is as easy as using a dependable utility designed to perform USB Mac recovery. This software scans the sectors of an external device to locate and recover these items:
- accidentally deleted files
- corrupted data
- formatted USB drives
- lost or erased files
A recent USB drive corruption or unexpected power outage can wreak havoc on your data. Even a simple file deletion may result in the loss of something important that you desperately need to retrieve. A USB retrieval utility offers a reliable approach to quickly salvage your data.
Stellar Phoenix Mac Data Recovery is the perfect utility for these situations as it can easily locate files on a USB device for retrieval. Whether deleted, corrupted, or erased during formatting, Mac Data Retrieval software provides an opportunity to quickly get your information back. To begin USB recovery Macintosh, simply install the software, connect your USB storage device, and perform the following steps with Stellar Phoenix Mac Data Retrieval.
4 Steps to Get Your USB Data Back
This tutorial will show how to recover any lost, deleted, or formatted data from a USB storage device. Please note that the device must be connected to your Macintosh to complete the retrieval process. To begin, you will need to open the application and click on Start New Scan.

Step 1: Choose the USB storage device for scanning. In the example below, ‘No Name’ is chosen because the device does not have a name. However, each scenario will be different. If your USB device has a name, choose it in the selection window.
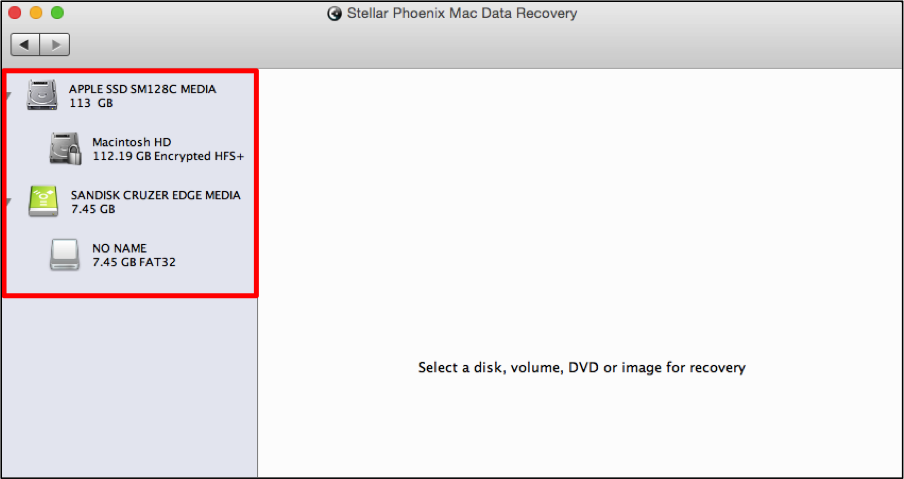
Important: The more you do on a USB device, the greater the risk of files not being recoverable. Stop working with the storage device as soon as possible and perform these steps to prevent data loss.
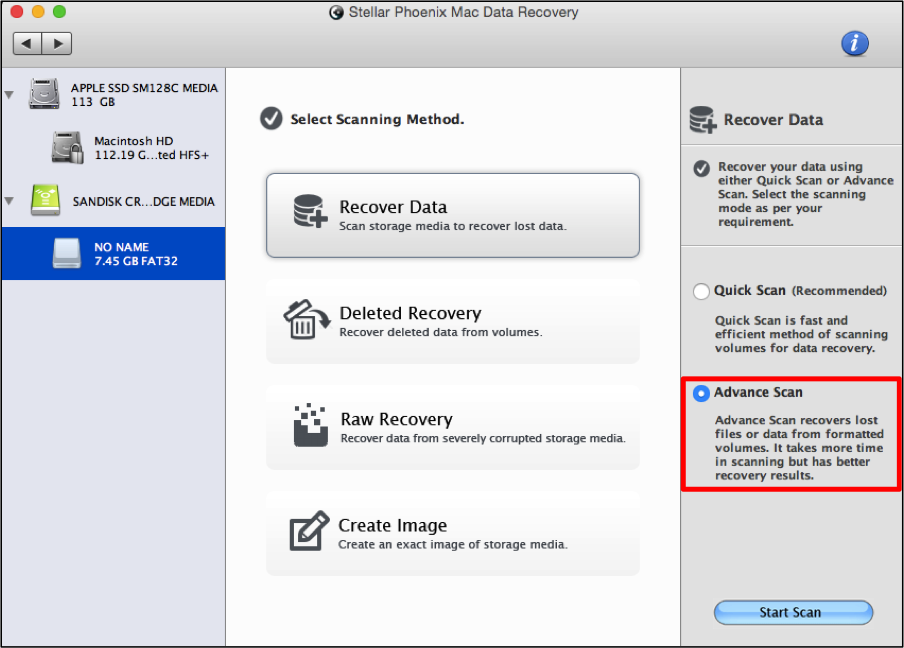
Step 2: Choose the appropriate recovery mode. You will need to select the Recover Data scanning method and then click on the radial for Advance Scan. This option is best when you want to recover data from a formatted volume such as a USB drive. It is also beneficial for retrieving lost files because it scans every block of volume.
The recovery process could take more time due to extended scanning requirements. Click on Start Scan which can be found in the bottom right of the screen to start performing USB retrieval for Macintosh.
The screen will appear as shown below throughout the scanning process. In some instances, you might need to pause the scan and this can be accomplished by clicking on the abort scan button (red circle).
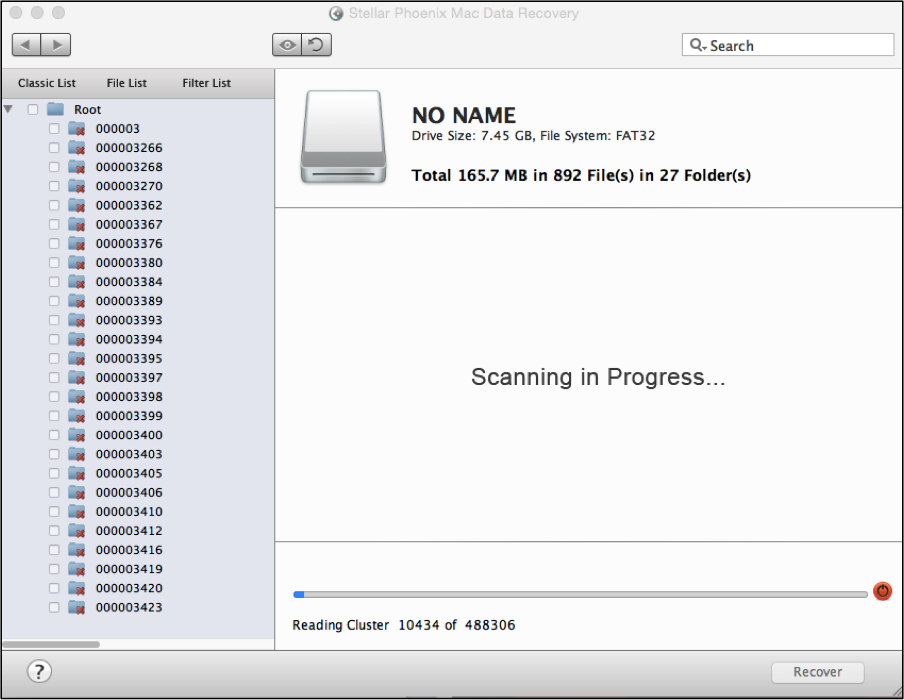
When scanning has completed, you will need to click on OK to close the success message and begin reviewing located files.
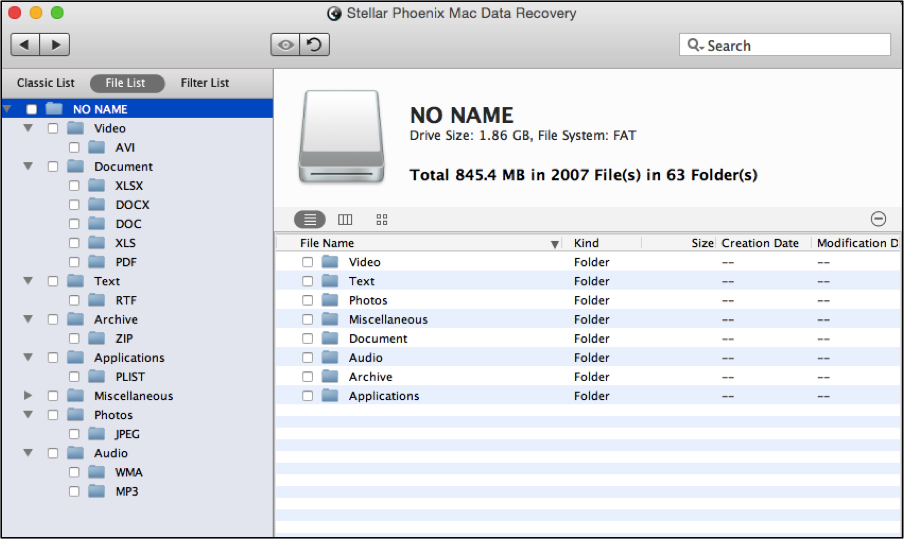
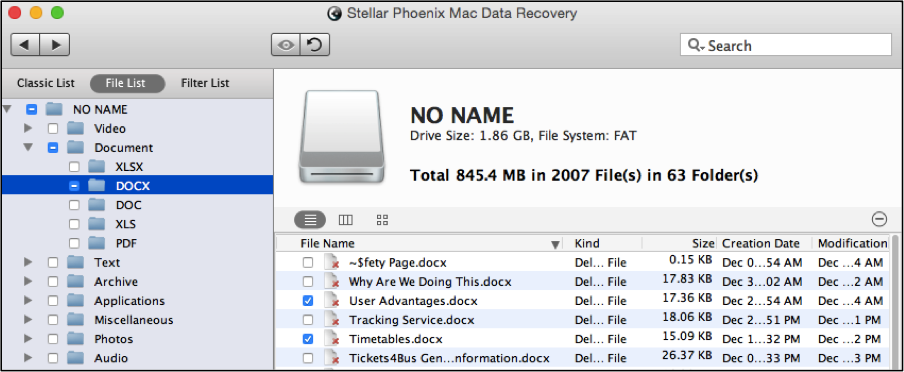
Step 3: By default, you will see the scan results in the form of a tree view based on their original location on the device. Click on File List to view located items based on format and type for easier identification.
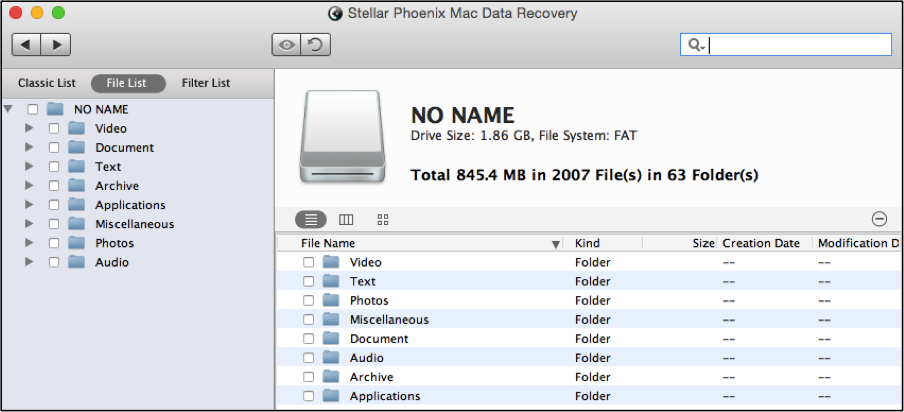
If you expand directories in the tree view on the left side of the screen after clicking on File List, it will appear similar to what is shown below:
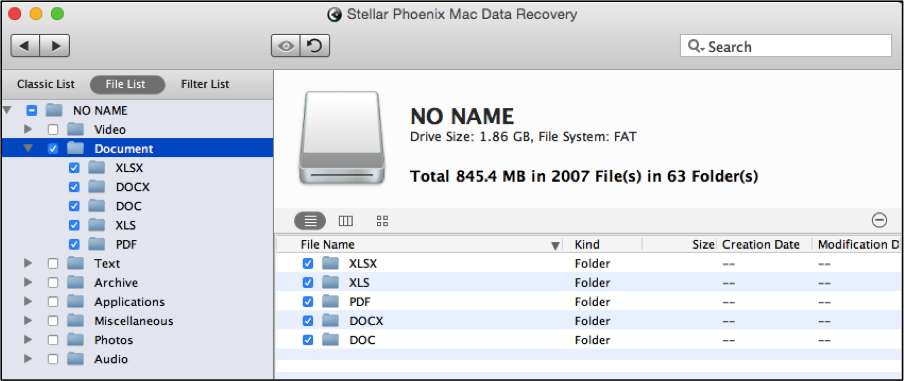
By clicking the checkbox for a specific folder in the tree view, you will be selecting all of its contents. For example, if you select Documents, then all files of this type will be recovered by the utility.
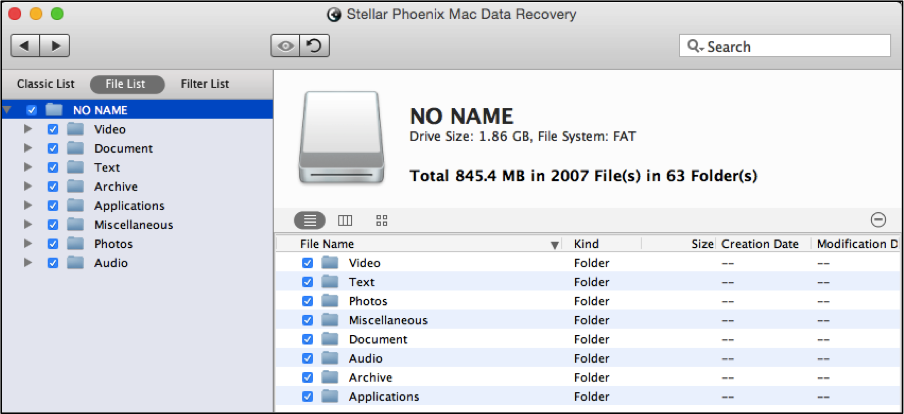
On the same note, you can check the box for the entire drive (No Name in this example) and every retrieved file will be selected for USB recovery.
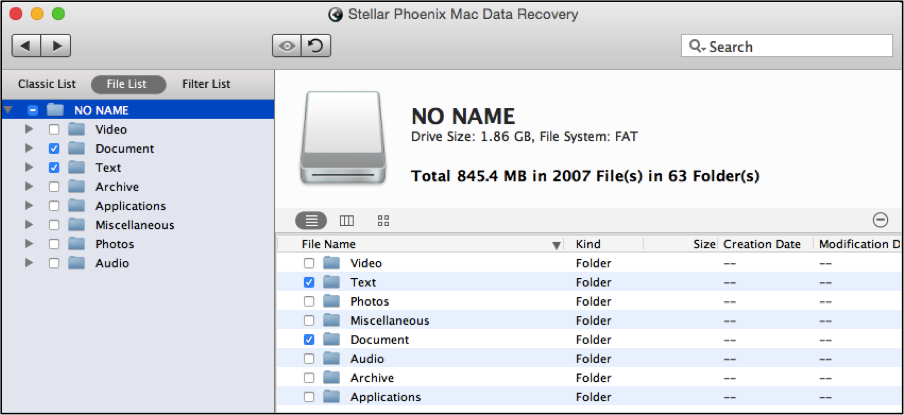
More than one folder may be selected in the tree view and in the example below, both the Documents and Text folders have been chosen.
To restore files individually, click on the corresponding folder name in the tree view and then select each item on the right portion of the screen. In this example, two DOCX files have been selected and will be recovered from the USB storage device.
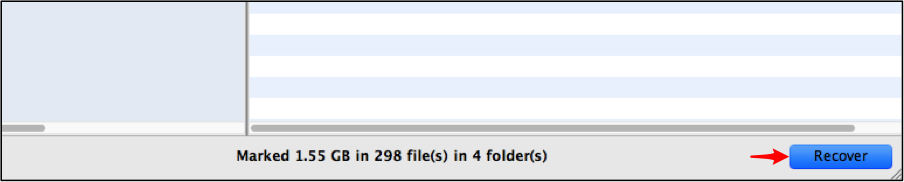
Step 4: Before the retrieval process can be completed, you will need to click on Recover and configure the location where these items will be saved.
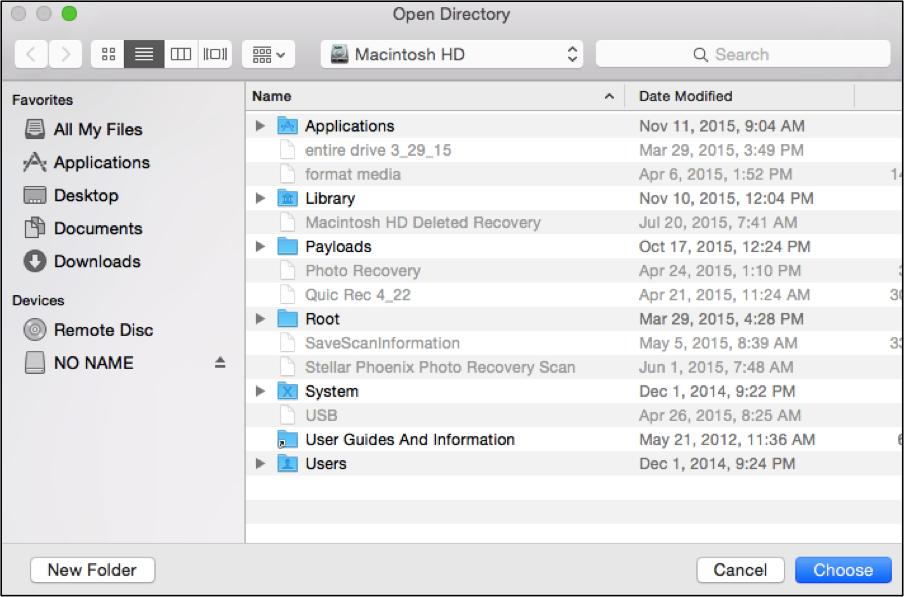
This utility places all recovered files in a Root folder for the configured location. To do so, maneuver through the file list and choose a save location. After which, click on Choose to continue with USB recovery for Macintosh.
This tutorial displays how simple it can be to retrieve lost, corrupted, accidentally deleted, or formatted over data from a USB storage device. First install the software and then complete these four steps:
- Select the USB storage device.
- Choose retrieval options and scan.
- Mark each file for retrieval.
- Wait for recovery to finish.
After these steps are performed, your files will be readily available in the saved Root folder. Stellar Phoenix Macintosh Data Recovery is an easy, reliable, and fast option when you need to quickly retrieve data from a USB storage device.