Using Time Machine on Mac
Using Time Machine on Mac: What is the Time Machine & How to Restore Data From It
Research conducted by companies of repute shows that data loss is a global phenomenon that runs to the tune of 1.7 trillion dollars every year. Obviously this covers both the losses faced by individuals and businesses. But taken together, the figure makes a compelling case for the practice of data backup.
Apple is Always a Step Ahead:
There is a reason why Apple is the most valuable and influential brand in the world. Anticipating the impact of information loss and the subsequent hassles, the company introduced the Time Machine – its in-built and native data backup system with its OS X 10.5 Leopard and the provision remains one of its most popular innovations till date.
What is the Time Machine & How Does it Work?
The Time Machine is programmed to adopt a layered approach to data back-up. As soon as it is configured with the choice of the hard drive or storage space that will act as the repository of back-ups, it gets to work within two minutes.
The application takes hourly, daily and weekly snapshots of the content in your device’s primary memory one region at a time and stores it in the preferred external drive. If it is hooked to the Time Capsule (Apple’s wireless router with network storage space) then the backups are taken without human intervention or the need to attach a USB device to the main memory.
The Time Machine is unique because it only backs up what has been changed from the last snapshot (image of the primary memory items or files).
It works with all standard external devices that support the Apple File Protocol (AFP) and the Time Capsule. In fact, anything that the application has access to can be used as storage space that accepts backups of the primary memory.
There are two conveniences you can enjoy being an Apple user:
1. You can choose the type of files that are backed up by Time Machine. If you want only Word documents and Excel spreadsheets to make their way to the external drive, images and videos will never take up storage space. This allows you to exercise a degree of control on the way the external storage unit is used and makes the available repository last longer.
2. You can retrieve specific files and folders. Since the Time Machine builds the back up in layers by taking local snapshots instead of a single snapshot of the entire hard drive, you don’t have to reinstate a huge volume of data to recover a particular item.
As soon as the external drive starts running low on space, older files are purged. The provision ensures that you always have 20% of the available disk space free for more backups.
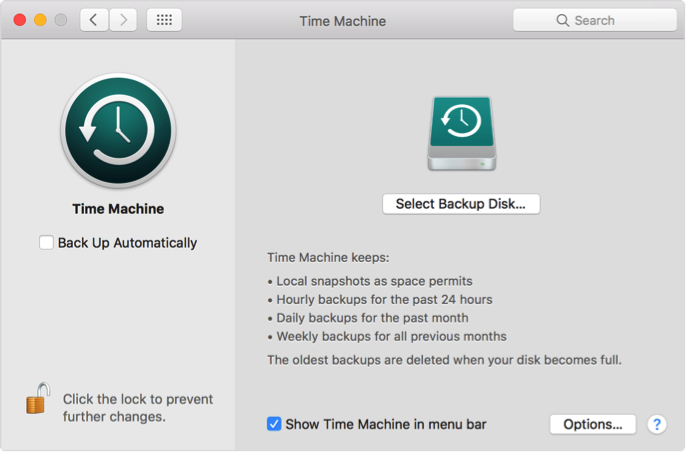
Configuring the Time Machine:
To configure the application, please follow the steps given below:
1. Choose the icon of Time Machine from System Preferences.
2. Activate the backup mechanism by toggling the slider “On”.
3. You will be prompted to select a backup disk. This is where the software will store the snapshots of the content. As already discussed, you can go with an AFP compliant hard drive or the Time Capsule.
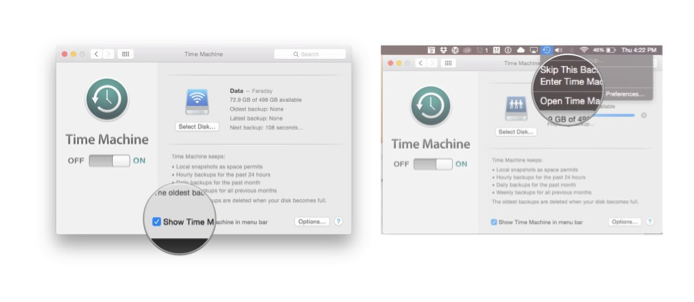
Retrieving a File:
Because of the layered approach to backups, you can not only retrieve the latest version of a file but you can also navigate the timeline to a date in the past and choose to retrieve that particular form of the item. This is hugely flexible.
1. Access the menu by clicking “Enter Time Machine”.
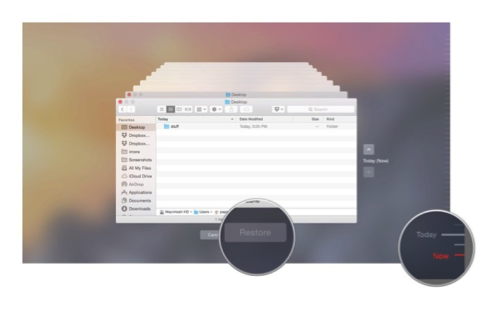
2. Choose the type of file you would like to retrieve from under the Favorites tab to the left of the screen and then use the up and down menu to the right to jump to the date when the contents were last altered. You can also go back days or weeks in the past.
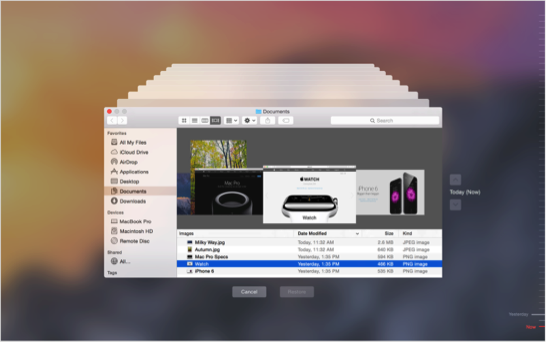
3. Click the space bar to preview the needed file and then hit “Restore”.
Restoring the Entire Hard Drive:
1. Enter OSX Recovery Partition by holding down the Command key and the R key together.
2. Select the option “Restore from Time Machine Backup” and then click “Continue”.
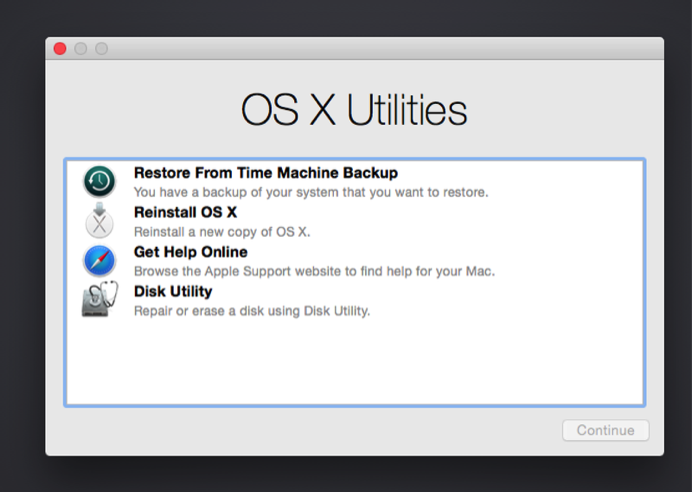
3. You will be prompted to choose the hard drive back up that makes the most sense. Select it and hit “Continue” again.
4. The Mac will start the process of restoring content and the device will need to be restarted once all the information is retrieved.
Using Time Machine on Mac is easy and intuitive. And the operations also have a high success rate given the fact that it is a native Apple application. Have you ever used this provision on your device? If yes, let us know your experience.