Mac File Recovery Software
Have you recently, by accident, have deleted important files or formatted a hard drive only to realize later on crucial information has disappeared? These mishaps are fixable as long as you quickly act to retrieve the data. A deleted file is not actually permanently removed from the computer until new data takes its place. Lost items still reside in the system but they can’t be traced through the local address table used to keep track of this information. Mac file recovery software can be used to locate these items on the drive and quickly restore them.
All you need is the right tool and a little resourcefulness to turn this substantial problem into an easy fix. Stellar Phoenix Macintosh Data Recovery is a dependable application for situations when you need to retrieve lost or deleted data on a Mac computer such as a MacBook Pro, an iMac, or a Mac Air. Before performing the tutorial below, you will need to complete the download for the Mac Data Retrieval utility, perform the install, and then open it on your computer. Once these steps have been completed, the utility may be used to scan the drive and locate any recoverable information.
How To Easily Restore Your Data
To locate files on your Mac, the utility must first be configured for the desired volume or drive and a retrieval method needs to be chosen. This allows the Mac file recovery software to scan the selected drive and locate files for data retrieval. The following tutorial will show how to perform a quick scan and retrieve files on your hard drive:
Step 1: To configure the scan for retrieval, first click on Start New Scan to choose the drive and a scanning method.

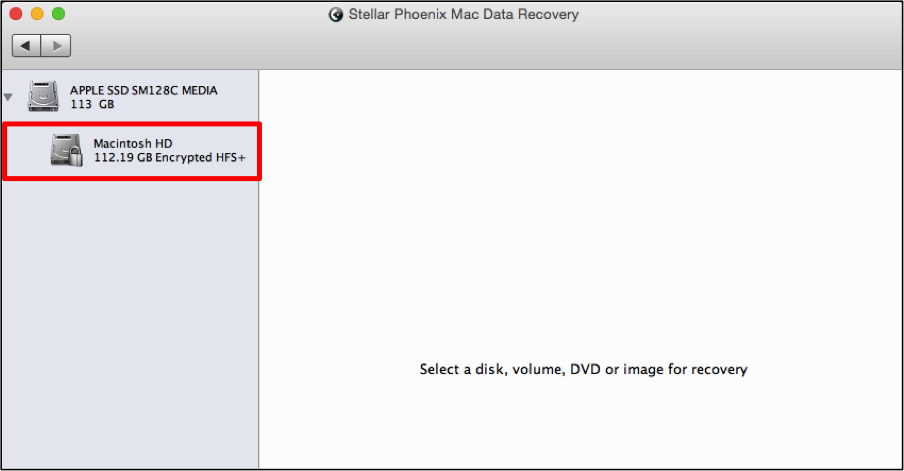
Next, choose the volume on your hard drive that needs to be scanned for file retrieval. Macintosh HD has been chosen in this example because it is the common drive name for most Apple computers.
Step 2: Click on the Recover Data option and make certain Quick Scan has been chosen. This option in the Mac Data Retrieval utility is used to perform a quick scan of the drive for any removed or lost files.

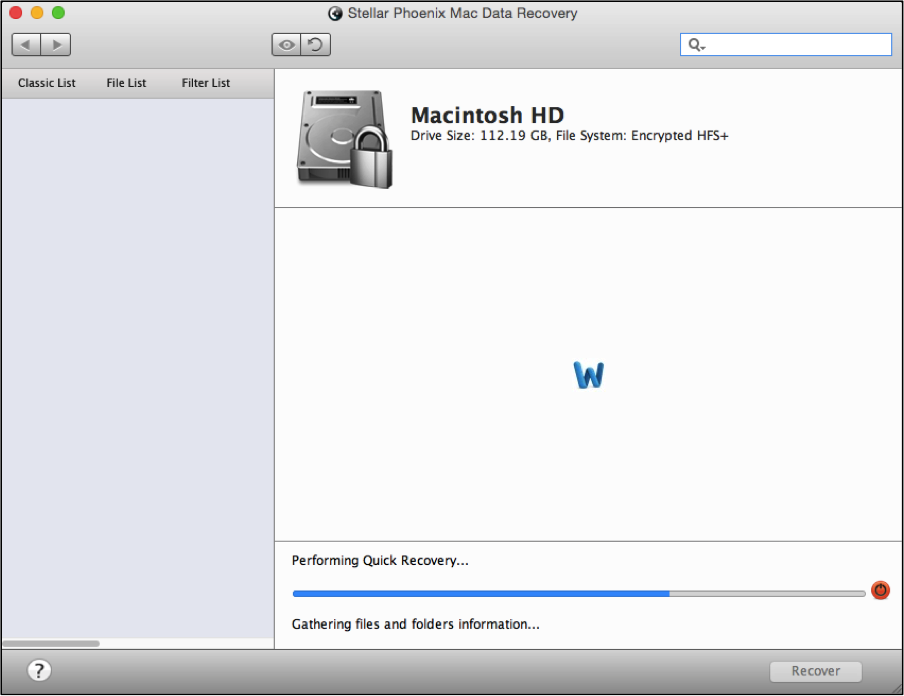
If this method does not find what is needed, you can choose the Advance Scan option to locate the files. The Quick Scan is recommended to shorten the scanning process and will typically find everything you need to retrieve. Click on Start Scan at the bottom right after choosing a volume and the utility will begin locating the files.
At the bottom of the screen, a progress bar is displayed and a tree view will appear in the left panel as scanning occurs. Use the red circle to the right of the progress bar to abort the process when needed. Then click on OK in the provided confirmation message after the scan has finished.
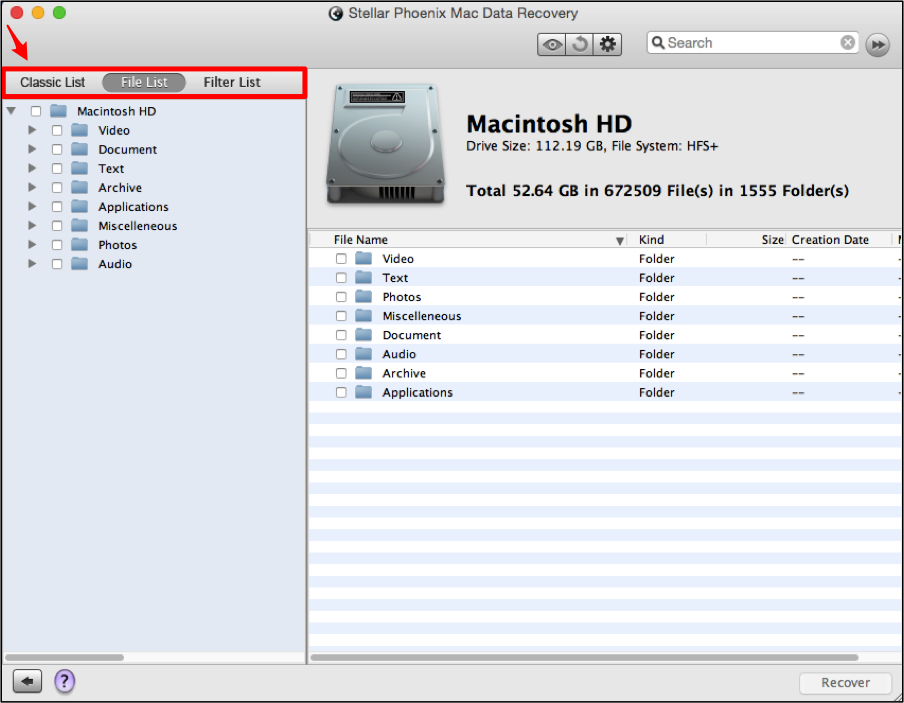
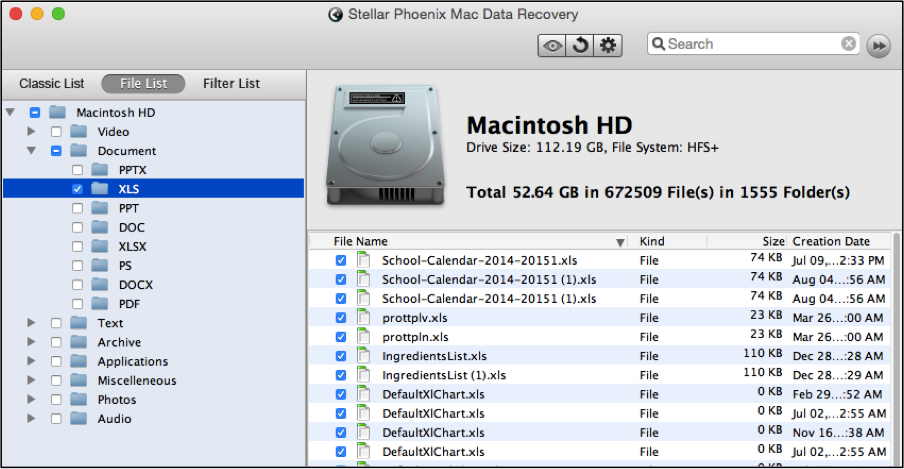
Step 3: View the results and choose what you need to recover. Click on File List in the left panel of the utility above the tree view to select files by type rather than their location on the drive.
If all files need to be retrieved, simply tick the checkbox next to the drive name in the left panel.
Each item in the tree view may be expanded by clicking on the arrow to the left of its name. To restore all files for a specific type, expand the view and then click the checkbox next to its name. All files found during the scan will appear on the right side of the screen and are automatically selected. In the provided example, the Document folder has been chosen.
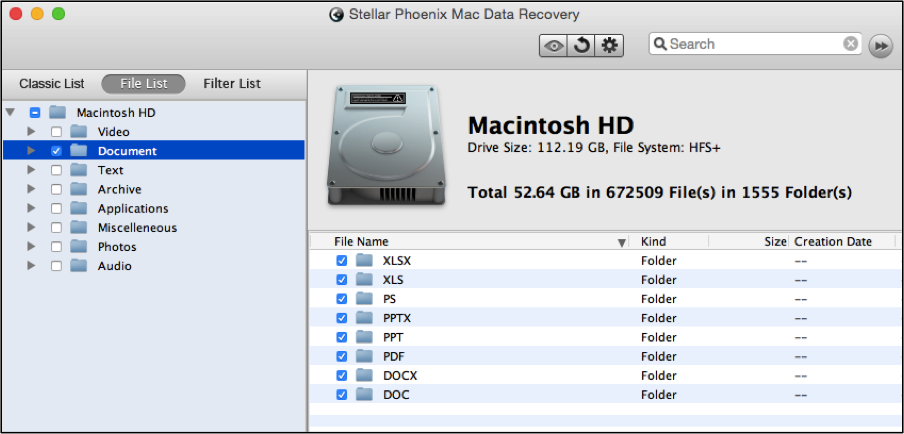
The Mac Data Recovery utility also provides the option to select certain formats for restoration. To do so, expand the file type folder (i.e. Audio, Photos, Documents, etc.) and then place a checkmark next to each desired format in the tree view. XLS in the Document folder has been selected in the example below. This means that all XLS documents will be recovered by the utility.
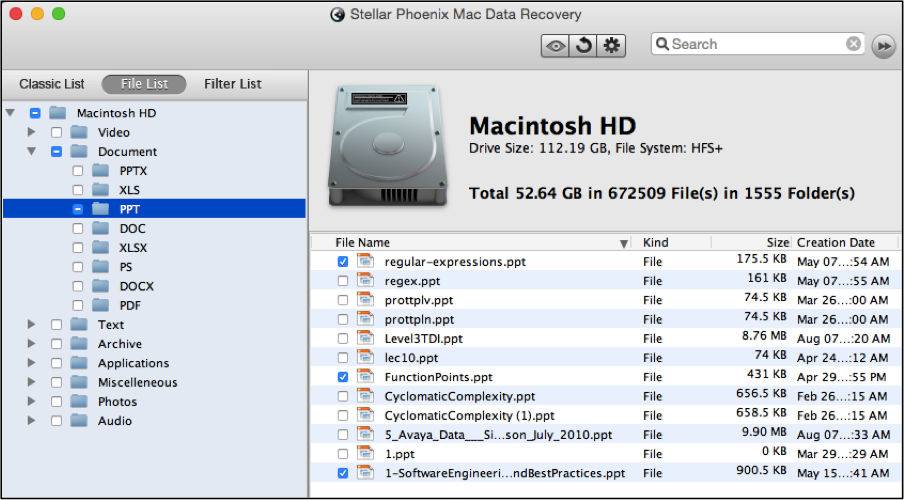
Moreover, you can make individual selections by expanding the tree view, clicking on the file format in the left panel, and then checking or unchecking items displayed on the right of the screen. Any item with a checkmark is currently selected for recovery. In the provided example, three Power Point (PPT) files have been selected:
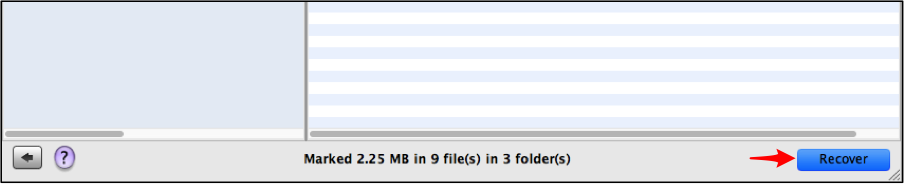
Step 4: Restore the chosen items by clicking on the Recover button. This informs the utility to restore the chosen files on your computer.
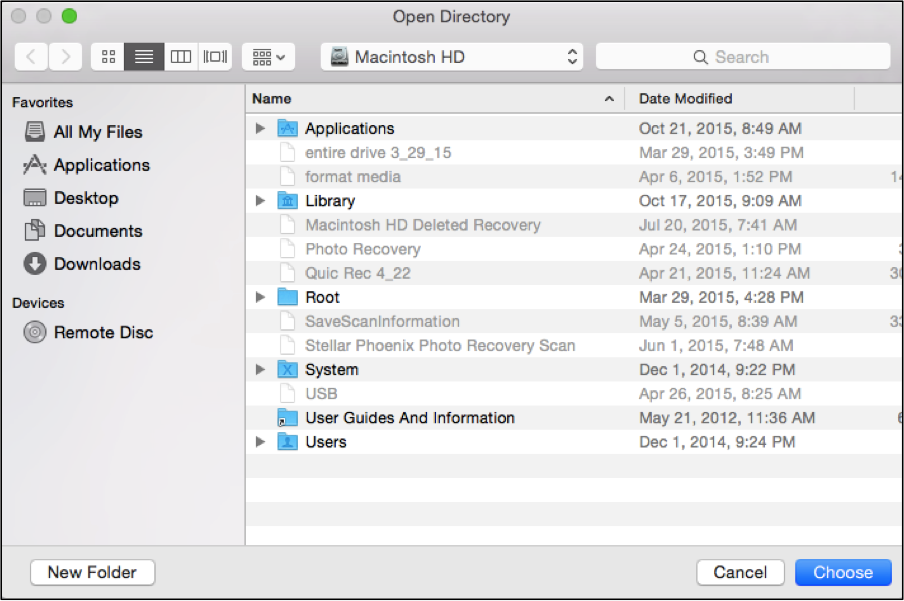
A save location must be configured and is used by the Mac file recovery software to store the retrieved data. Browse to where you want the files to be saved and then click on Choose.
With Macintosh file retrieval software, the process of regaining a single or multiple files is easy. An accidentally removed file or lost information is not a big deal with the right tool. After the utility has been installed, you will need to perform these four steps:
- Click on the volume or drive.
- Pick a recovery mode and scan the volume.
- Select your files.
- Finish the recovery.
Have you recently lost or deleted files? Stellar Phoenix is an easy-to-use solution for reliable data retrieval. Installation and configuration only take a few minutes and by following this tutorial, any needed files will be restored with ease. Mac file recovery software is a fast, simple solution for the problem.