Mac SSD Data Recovery
How to Perform Mac SSD Data Recovery
An SSD drive often holds important data, whether it is family memories or critical files for your business. When you save files to a local or external SSD drive, it becomes almost second nature to assume it will be there until you delete it. However, a number of events can occur that may result in loss or deletion of files. This includes a sudden power surge or crash resulting in corruption as well as the common accidental deletion we have all experienced at one time or another.
If files have suddenly gone AWOL on your SSD drive, then you need a reliable tool to regain this information easily. Stellar Phoenix Macintosh Data Retrieval offers a sensible option to your file loss or deletion needs. Whatever the problem, you can use it to scan and recover any information that cannot be accessed or opened by the operating system due to corruption. It may also be used to get any deleted files back from the SSD drive.
With Stellar Phoenix Mac Data Retrieval, the process entails just a few steps and can be used to regain everything from the drive or a select set of files. To use it, you will need to perform the following steps:
1. Download Macintosh File Recovery.
2. Install it on a Mac computer.
3. Connect any external storage media.
4. Open the utility on your computer.
Once these steps have been completed, you will be able to follow the steps shown in the provided tutorial. Mac File Recovery also has options for previewing your files prior to the data retrieval, searching for specific files, and customizing what will be salvaged from the scan results.
5 Steps to Mac SSD Data Retrieval
If you will be recovering files on an external SSD drive, first connect it to the Mac computer where the utility will be running. Then choose Start New Scan to configure the retrieval and begin.

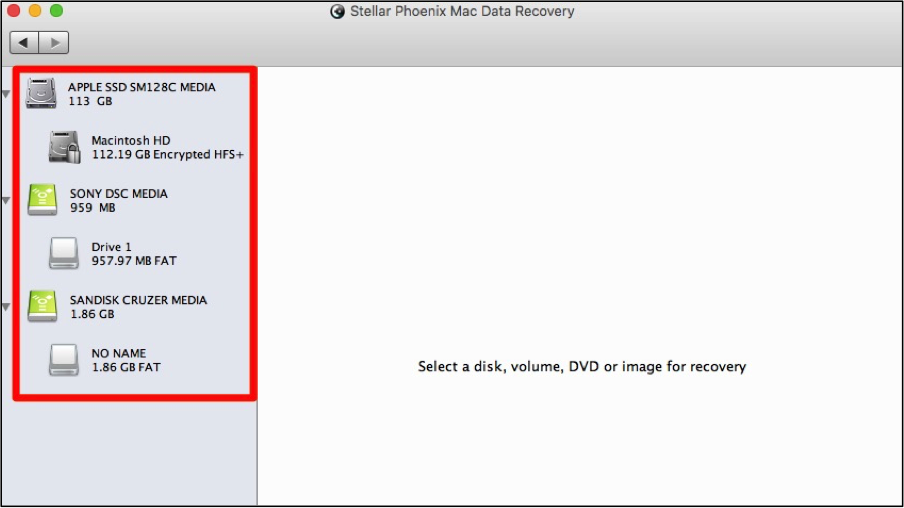
Step 1: Select an SSD Drive. Each drive and supported type of storage media currently recognized by your computer will appear in the left panel. To make a selection, click on one of the listed items.
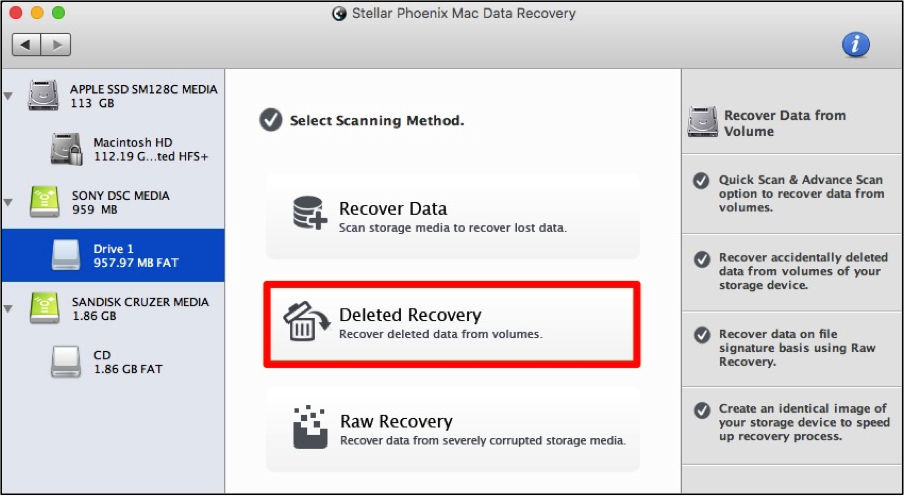
Step 2: Pick a Scanning Technique. Mac Data Recovery provides multiple options when it comes to configuring a scan for retrieval:
- Recover Data – The most common option to use for a simple file retrieval. It offers both a quick and an advanced scan option to ensure files are found.
- Deleted Recovery – If the files were specifically deleted from your computer or an external storage source, then a deleted recovery might be necessary to track down the files for retrieval.
- RAW Recovery – This option is best when the drive has experienced corruption. You can use it to perform a photo recovery or to retrieve everything.
For this example, we will be performing a Deleted Recovery to ensure all files are found. Click on an option to make a selection within the utility window.
When you perform a deleted retrieval, it can be a Quick Scan or an Advanced Scan. We recommend trying the quick scan first and then using the advanced option when it does not find the files you need. Tick the radial next to Quick Scan to select this option.
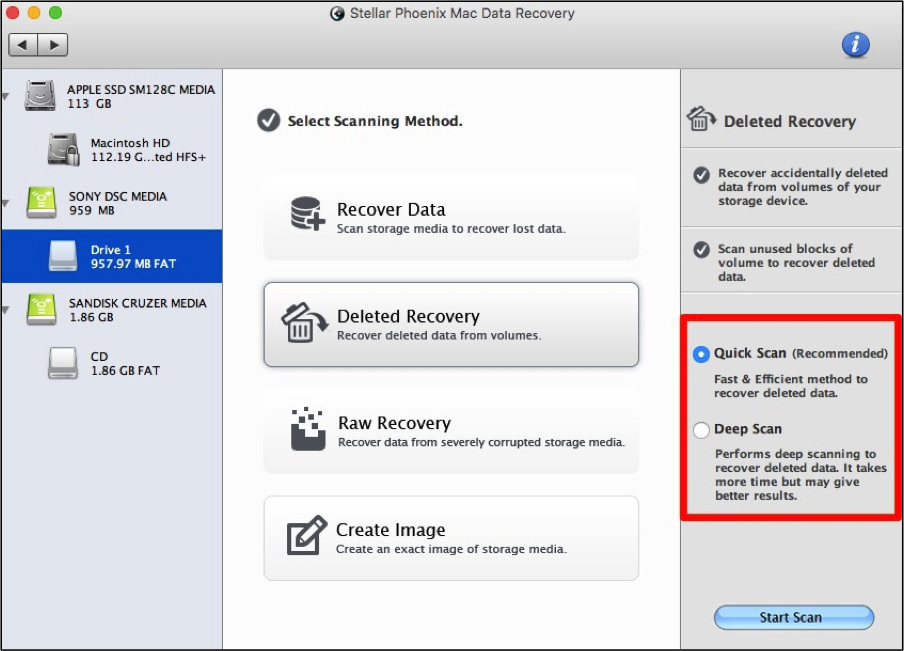
Step 3: Scan the SSD Drive. The scan must be started by clicking on the Start Scan option in the screen shown above. Once this has been done, you will need to give the utility time to complete the scan and locate available files for recovery.
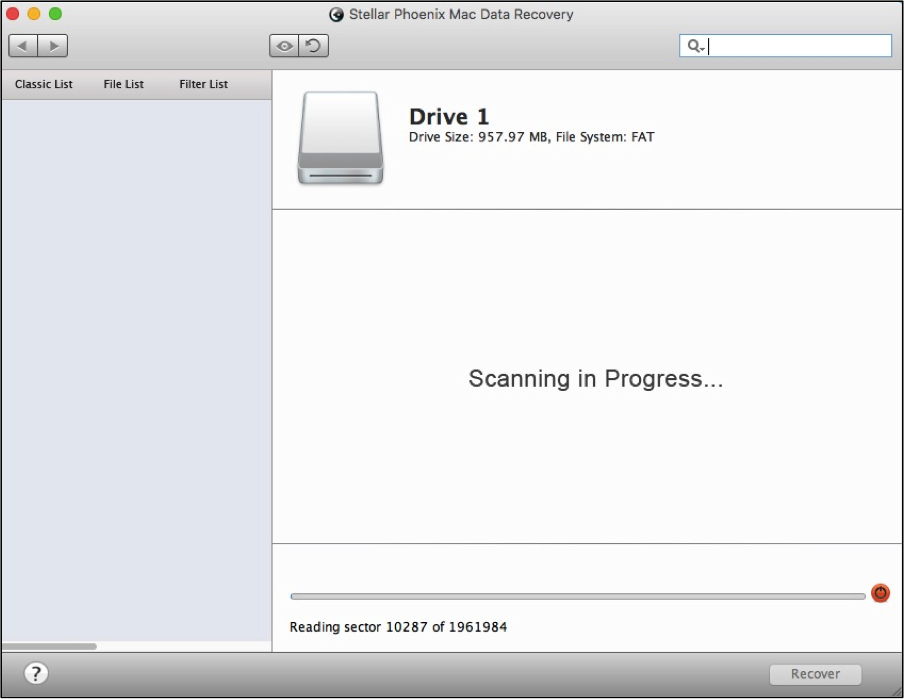
Note: Use the button to the right of the progress bar to abort the scan. This will terminate the scan completely and you will have to start over at a later time.
Step 4: Select SSD Files. Use the File List option to organize the scan results by type.
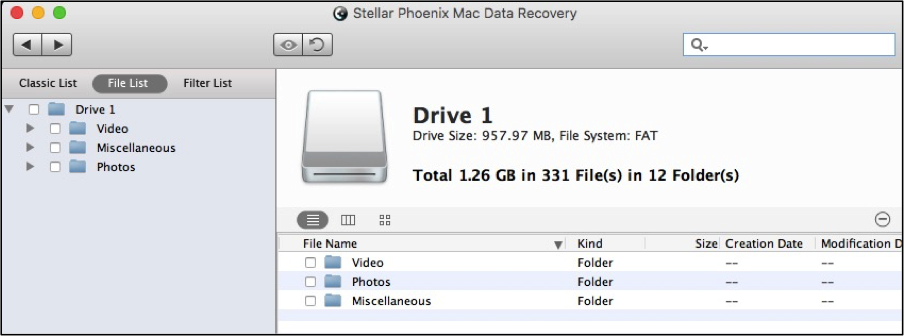
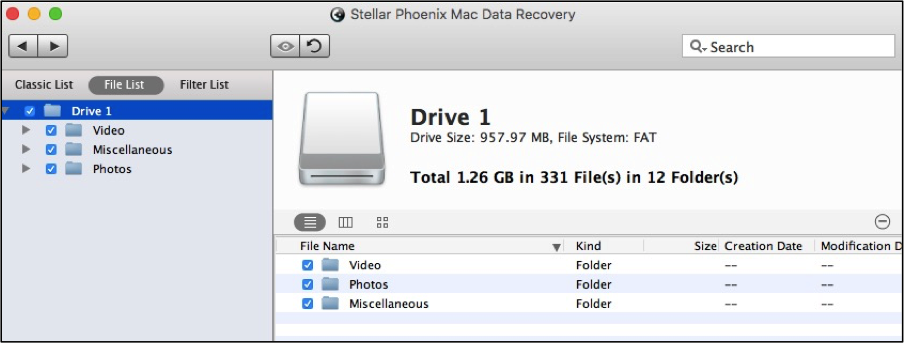
Check the box next to the SSD drive name if you want to retrieve all data shown in the scan results. For a complete recovery, skip ahead to Step 5 after doing so.
Each folder in the tree can be expanded to see available formats. For example, when you expand Photos or Video, you will see additional folders based on what was found during scanning. Use the arrow to view the folders in the tree or click on the folder to view the information on the right portion of the screen.
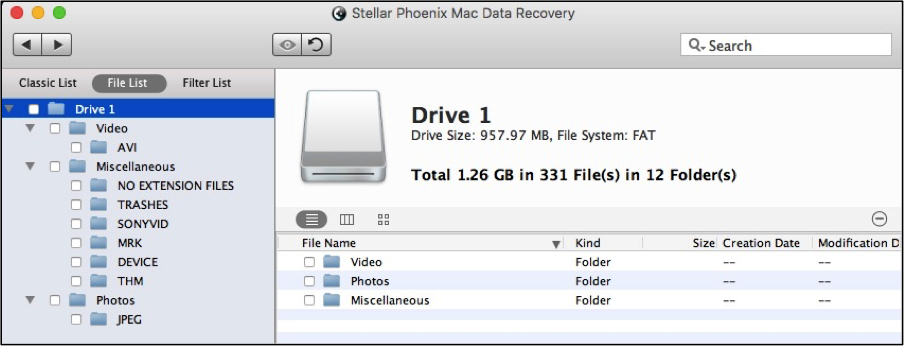
You can mark entire types like Photos or tick the checkbox for specific formats. When certain formats have been selected, the checkbox will have a dash and a checkmark when the entire folder contents have been chosen.

Another option provided by Mac Data Recovery is to click on a format folder such as AVI underneath Video and then choose each file to be recovered. You can even preview the files in some instances by double-clicking on the file name.
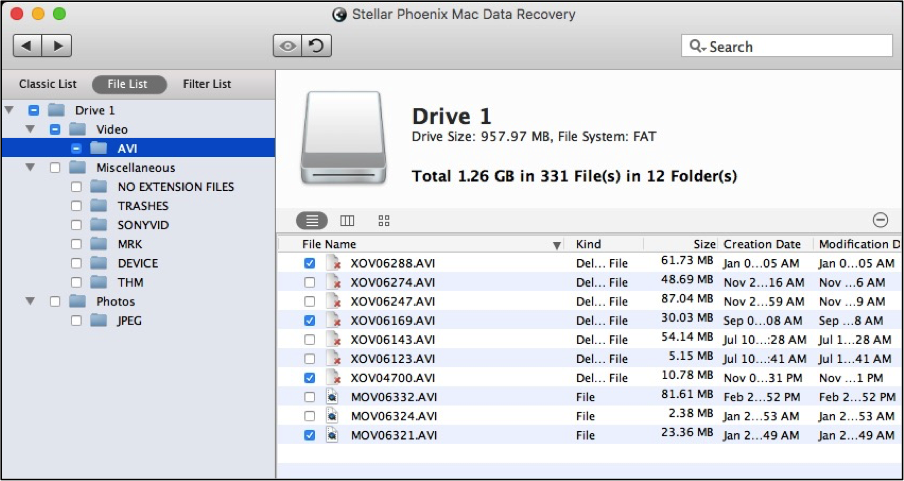
Once all files have been chosen, continue to Step 5 to finish the recovery.
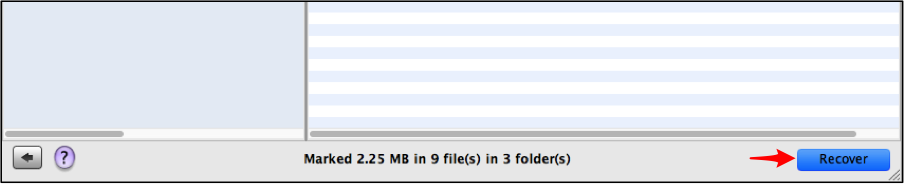
Step 5: Regain SSD Data. In order to retrieve data from your SSD drive with the utility, you will need to click on Recover. This will result in a prompt to choose a save location for the chosen files. Then Mac File Retrieval will complete the file retrieval and save the files to the configured save location.
Things can go wrong even when using an SSD drive and when they do, it is a good idea to have a dependable recovery tool available. With Stellar Phoenix Macintosh Data Retrieval, you can retrieve deleted files, salvage files from a corrupted SSD drive, or even perform a quick retrieval to get back lost or deleted files. To perform Mac SSD file retrieval, all you have to do is complete the following five steps as shown in the tutorial:
1. Select an SSD drive.
2. Pick a scanning technique.
3. Scan the SSD drive.
4. Select SSD files.
5. Regain SSD files.