Mac Disk Recovery
Mac Disk Recovery: Need a Reliable Way to Get Data Back?
Has a recent disk corruption, reformat, or other issue caused your data to be unintentionally deleted or lost? Even a simple power surge can wreak havoc on a computer’s local hard drive or external storage media. Whatever the cause of your data issue, you will need a reliable tool capable of salvaging this information. Stellar Phoenix Mac Data Recovery is the right tool for the job! With this application, it is possible to:
- Scan local or external disks.
- Retrieve the entire disk.
- Make custom file selections.
- Preview results & files.
- Safely save retrieved disk data.
Mac Data Recovery is designed to locate deleted or lost data on a disk and provides an easy interface for the recovery process. You can scan the entire drive quickly or use another option to perform a deeper scan for data. After the scan, the utility displays the results for previewing and selection. You have the option to regain the entire disk or only specified files.
A tutorial has been provided below to show how easy it can be to perform Mac disk recovery. You’ll just have to install Mac Data Recovery on your computer and then complete the steps to see it in action.
How To Regain Your Entire Disk
With Mac Data Recovery, you have the option to perform a quick scan or a deeper scan to locate deleted data. Additionally, the entire disk may be recovered or your own custom selections. The utility will need to be installed and running to begin. If the disk is external, make certain it has been connected to your Mac computer.
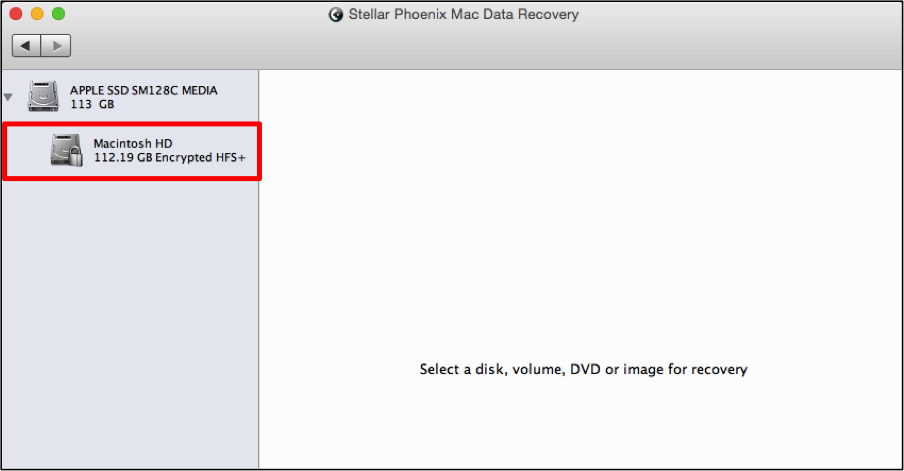
Step 1: Select the Drive. Click on Start New Scan to choose the disk you want to recover data from.

Then, in the left panel, click on the disk the utility should scan for files and retrievable data. For a Mac computer, this could be the primary drive Macintosh HD or another hard drive. It could also be external storage media such as a USB drive, flash drive, etc.
Step 2: Configure the Recovery Scan. Next, you will need to choose how the scan will be performed by the utility. The following options are provided:
1. Recover Data – In most scenarios, this option is enough to regain lost or deleted files on a disk or external media. It provides a Quick and Advanced scanning option.
2. Deleted Recovery – Use this option to perform a deeper scan and locate files that have been deleted from storage volumes or to locate hard-to-find files.
3. Raw Recovery – This should only be used when the above choices are not providing the results you need and when the disk has experienced severe corruption.
For this example, we will be choosing the Recover Data and Quick Scan options to quickly show how easy Mac disk recovery is using this utility.

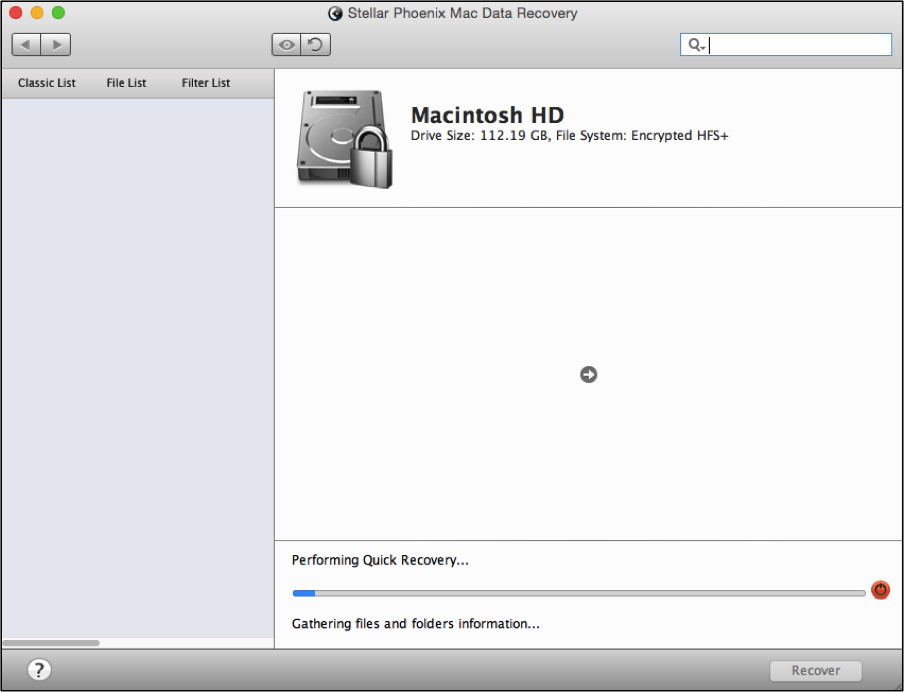
Once finished, click on Start Scan to begin locating any recoverable files on the chosen disk.
The screen will appear as shown below during the scanning process. You can view the progress bar to see how much longer the scan will take or even abort the scan when the need arises. Once finished, click on OK in the confirmation window to begin previewing the results.
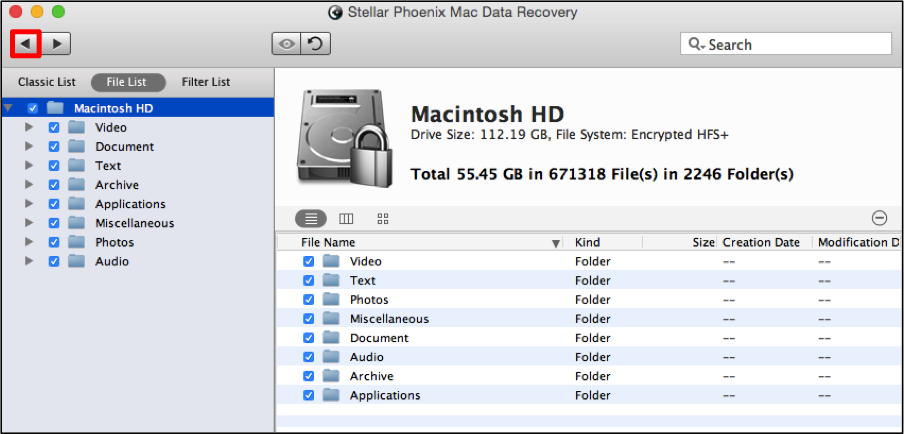
Step 3: Select the Entire Disk. With Mac Data Recovery, it is possible to regain every file found by the scan or to choose only specific files. In this tutorial, we will show how to recover the entire disk.
To do so, place a checkmark in the checkbox for the disk in the tree view. It will appear as the top selection in the list. This will select all folders for recovery and is labeled as Macintosh HD for this example.
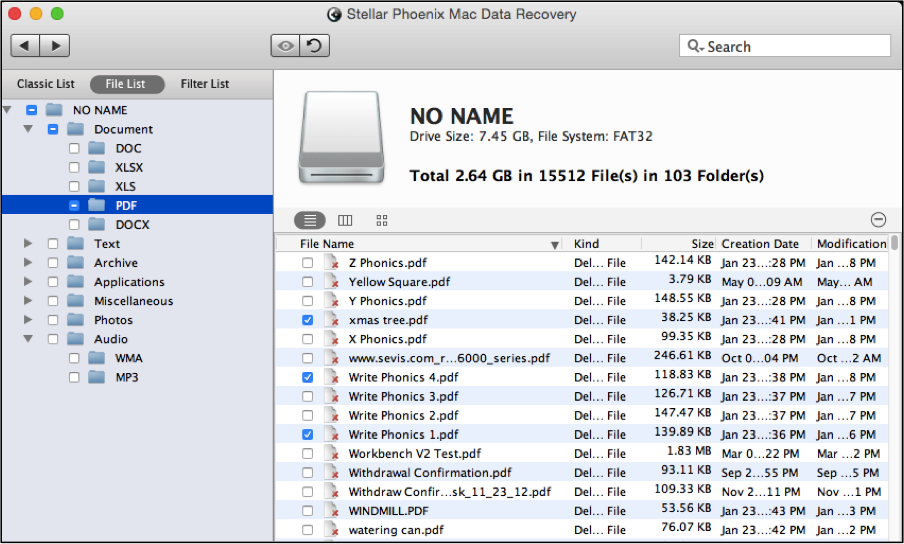
By clicking on a format folder such as PDF, you will be able to preview individual files on the right side of the window and check each file you want to recover.
Step 4: Finish the Data Retrieval. After making your selections, the last step will be completing the disk recovery. Click on Recover and then browse to where you want the retrieved files to be stored (computer or external storage).

Stellar Phoenix Mac Data Recovery will save the disk data to whatever location you have chosen.
So for Mac disk recovery, you can perform a scan and then select the entire disk for recovery. While this tutorial shows how to perform a ‘Quick Scan’, you can also perform an Advanced Scan or Deleted Recovery to ensure all data is recovered from the disk. As shown in the tutorial, the following will need to be done for a successful Mac disk recovery.
1. Select the drive.
2. Configure the recovery scan.
3. Select the entire disk.
4. Finish the data retrieval
Stellar Phoenix Mac Data Recovery provides a simple way to get your data back when in a pinch. Give it a try today!