MacBook Photo Recovery
A Simple Solution for MacBook Photo Recovery
Photo loss or accidental deletion on a MacBook is devastating whether these images represent an important family memory or are vital for work. If photos are removed from the computer unintentionally or lost due to some type of drive corruption, you can still get these memories back! A dependable recovery utility is necessary to salvage the files. The Mac operating system will not be able to find them once the physical storage address has been removed from the lookup table.
Essentially, the address is deleted when a file is removed, but the data remains until new data needs the storage location. This means it can be retrieved by a recovery utility if action is taken quickly. Stellar Phoenix Mac Data Recovery is a tool you can use to track down and restore any deleted or lost files from the drive or storage media. The utility is able to find any deleted file that has not yet been overwritten with new data as well as files lost due to drive corruption.
Stellar Phoenix Mac Data Recovery must be installed on a Mac computer and running to scan a drive or connected storage media for data. Once the scan has successfully finished, you will be able to:
- See the scan results.
- View individual files.
- Select files to retrieve.
- Search for specific files.
- Choose where data is saved.
The tutorial below shows how to specifically regain photos on your MacBook; however, Mac Data Recovery may also be used to find more than 300 types of files on a local drive or any supported external storage media. After installing the application, follow the tutorial below to see how easy MacBook photo recovery can be when using Stellar Phoenix Mac Data Recovery.
Complete these 4 Steps to Get Photos Back
Since the tutorial shows how to recover photos from the local drive of your MacBook, all you need to do is open the utility and click on Start New Scan. However, if you need to regain images from an external storage such as a USB drive or a hard drive, the storage will need to be connected to the computer as well.

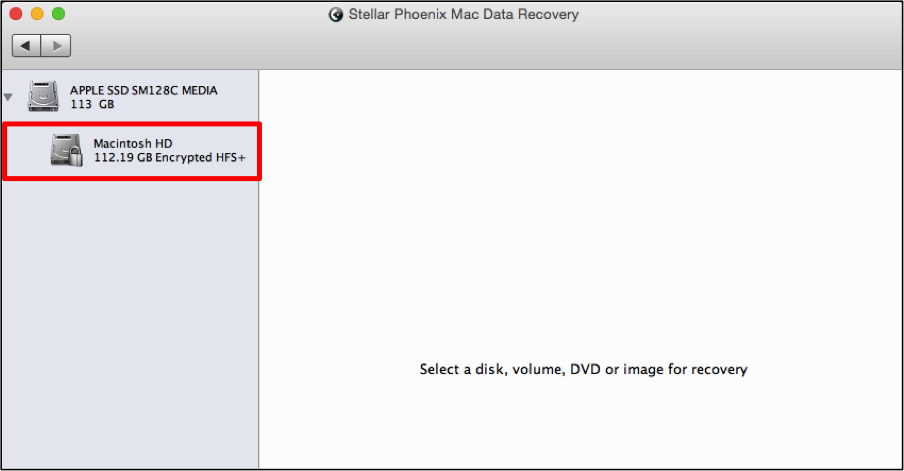
Step 1: Select the Drive or Volume. Mac Data Recovery will display each local and external storage source in the left panel. For local drives, you will see the entire drive and each volume listed underneath it.
Click on one of the displayed sources to select it for recovery. For this tutorial, we will be scanning the Macintosh HD volume of the local hard drive.
Step 2: Pick Configuration Options & Scan. The utility offers various options for configuring how the scan will be performed on the selected drive or volume. In this tutorial, we will be choosing Recover Data to perform a basic recovery scan.
(You may also choose Deleted Recovery to track down removed files or a RAW Recovery to scan a corrupted drive.)
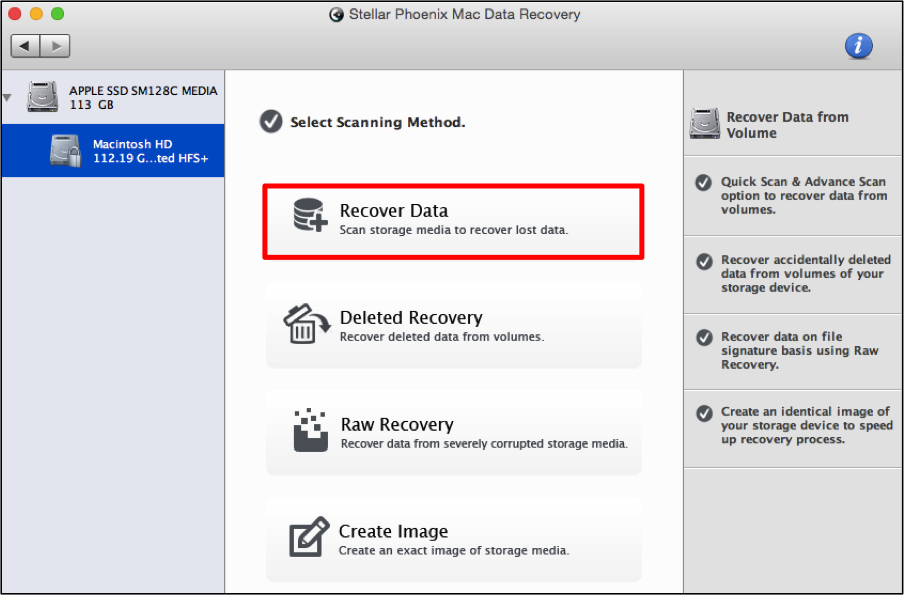
Next, the Recover Data option offers two types of scans. The Quick Scan option is the fastest choice for salvaging data and typically will be able to locate the files. If it does not, then you can run an Advanced Scan, which performs a deeper search of the drive or volume.
To select an option, tick the radial next to its name in the right panel. For this example, a Quick Scan is selected.

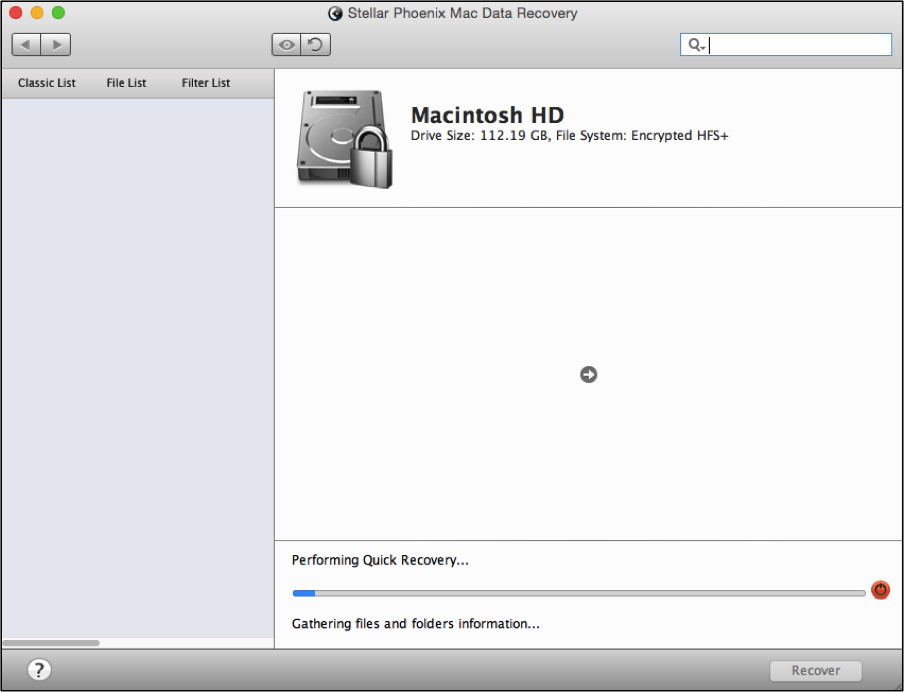
Below the scanning method options, you will see a button labeled Start Scan. Click on this button to initiate the scan of the chosen drive or volume. Wait then as the utility locates every recoverable file. Use the abort scan button to stop the scan or the progress bar to track the scan’s progress. Click on OK in the confirmation pop-up window after scanning finishes.
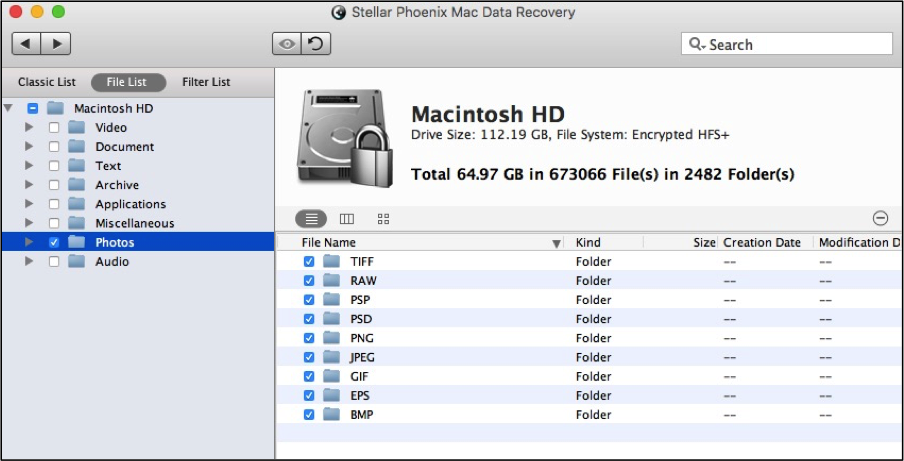
Step 3: Select Photos for Recovery. Before selecting files, it is recommended to change the result organization to File List. This will organize results by type thus making it easier to find and preview image files found during the scan.
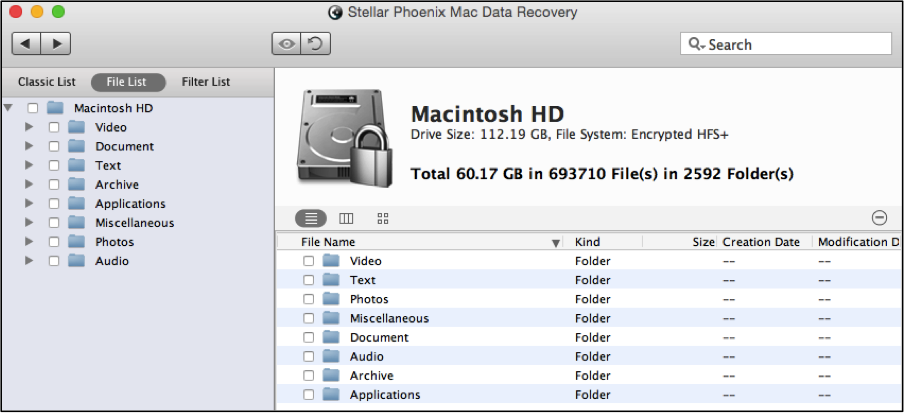
As you can see, a folder titled Photos resides in the tree view and contains every image found. If you want to regain all photos, simply tick the checkbox to the left of this folder. On the right, you can see the various formats that will be recovered by the utility.
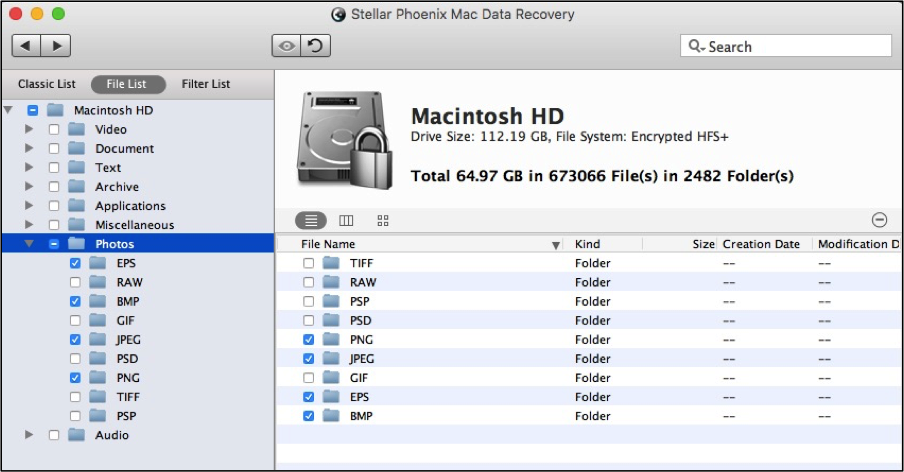
Not every format has to be recovered and you can expand the folder in the tree by clicking on the arrow to its left. Another option is to click on the folder name and each format folder will appear on the right side of the screen. Then check each format you want to include in the recovery. In the example below, these formats have been chosen: PNG, JPEG, EPS, and BMP.
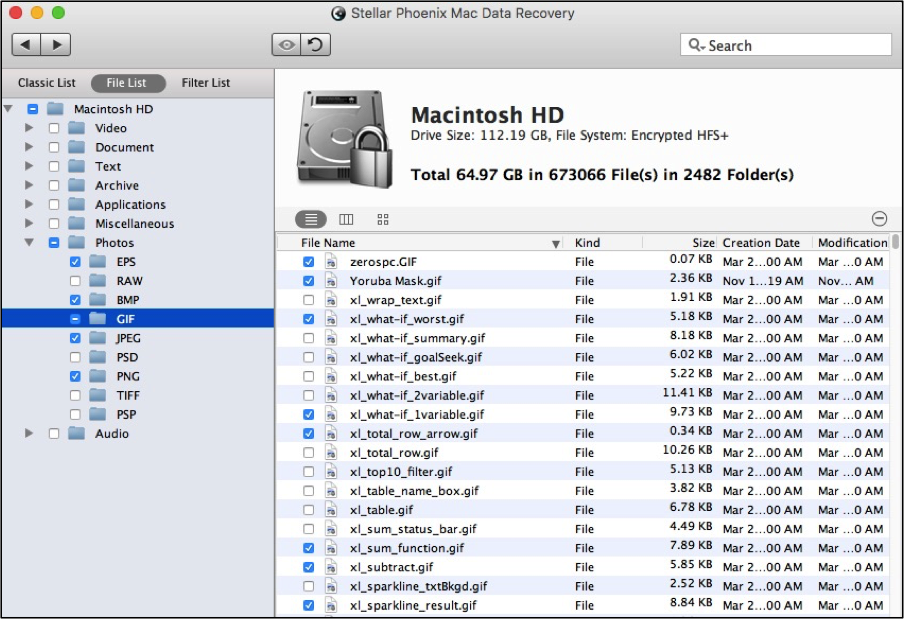
With this utility, you may also preview and select individual image files. To preview a file, double-click on its name and follow the prompts for previewing. If you want to select specific files, tick the checkbox for each one. In this tutorial, a few files have been marked for recovery within the GIF folder.
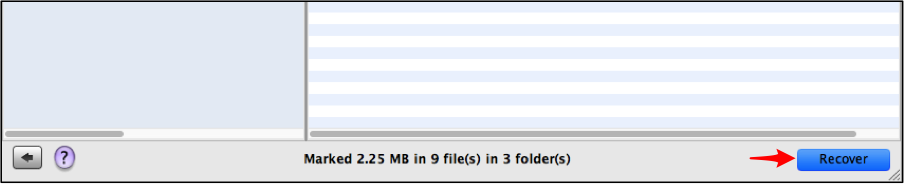
Step 4: Salvage Chosen Photos. The recovery is not complete after selecting files and you will need to click on Recover to actually regain the data. Upon doing so, a prompt will appear for configuring a save destination. Choose a location and then wait as the utility finishes the recovery process.
MacBook photo recovery for lost or deleted images does not have to be complicated or a hassle. Stellar Phoenix Mac Data Recovery offers a simple tool for these unexpected problems. Whether the photo was removed unintentionally or a volume has experienced corruption, the problem is under control when you have Mac Data Recovery. To regain all or a select few photos from your local drive, complete the listed steps as shown by the given tutorial:
1. Select the drive or volume.
2. Pick configuration options & scan.
3. Select photos for recovery.
4. Salvage chosen photos.