How to Recover Mac Deleted Folders
It doesn’t really matter whether you use a Mac or a Windows machine, files and folders are the building blocks of our understanding of the way digital data classification works. From the perspective of the hard drive memory storage space, a file is a discrete data lump comprising of multiple bits while a folder is a logical container that can be given an easy to remember name and is the holder of various files of different data types. It must be kept in mind that a folder doesn’t have a size of its own. It is as large or as small as the files that are stored in it.
Even though the Mac automatically sends all deleted files/folders to the Trash without scrubbing them permanently from the hard disk, oftentimes, harried users may go ahead and empty it realizing too late that they need to access the information in certain files. This might otherwise be a cause of concern. But with Stellar Phoenix Mac Data Recovery, you’ll be able to know how to recover Mac deleted folders without any hassle. Get back deleted folders, complete with original name and the files stored in them, in a breeze.
An Early Scan is a Successful Scan
Before diving into the specifics of a scan, it is important to note that scans that are initiated early on, as soon as data loss is detected, especially in the case of deletions are scans that have the highest probability of a full and complete recovery.
The Five Step Recovery Process
Stellar Phoenix happens to be a very user-friendly and intuitive utility in retrieving deleted Mac files as well as its folders.
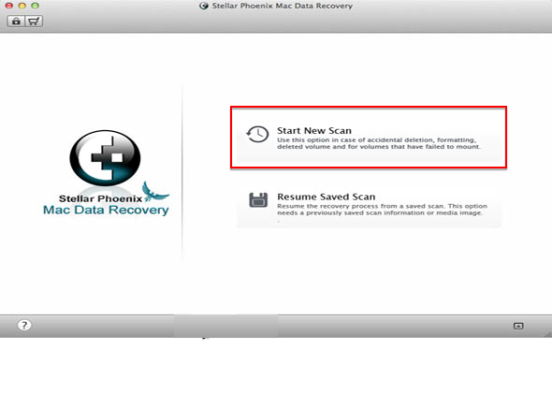
1. To get started, launch the program and from the home screen, choose the option ‘Start New Scan’.
2. The next screen is known as the selection screen because it presents all the settings that a user needs to customize the scan as per the conditions and nature of data loss.
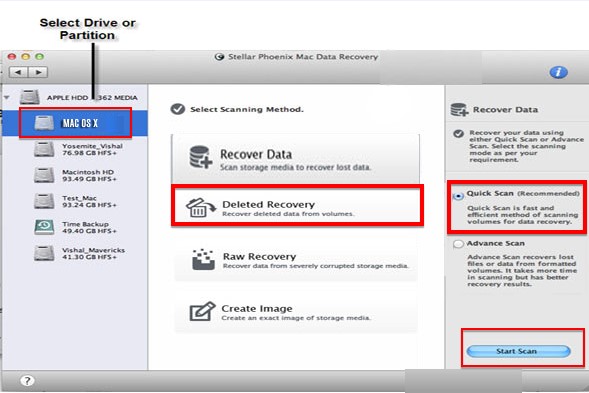
- The first thing that you need to choose is the hard disk or the external memory that has to be scanned for the salvageable items. Often when a drive or memory is not given a name by the user, it shows up as ‘No Name’. As is evident, for the purpose of this tutorial, you must scan the hard disk of the Mac and thus the option Mac OS X is highlighted.
- The next setting to be selected is the scanning method. Will Stellar Phoenix look for all lost data or will it restrict its search to deleted items only? Will it need to utilize additional resources to repair and recover a severely corrupted memory pool? This is decided by the centrally listed options. To recover deleted folders, choose Deleted Recovery which deals with the reinstatement of deleted data.
- The last setting is the scan mode. This decides the depth of the scan. Generally, items that are deleted are easier to retrieve thus Quick Scan is adequate power for them. Data rendered inaccessible by OS malfunction or virus corruption is a more complicated proposition and needs Advanced Scan to be triggered.
Once the options have been carefully weighed and appropriate ones chosen, hitting Start Scan initiates the process right away.
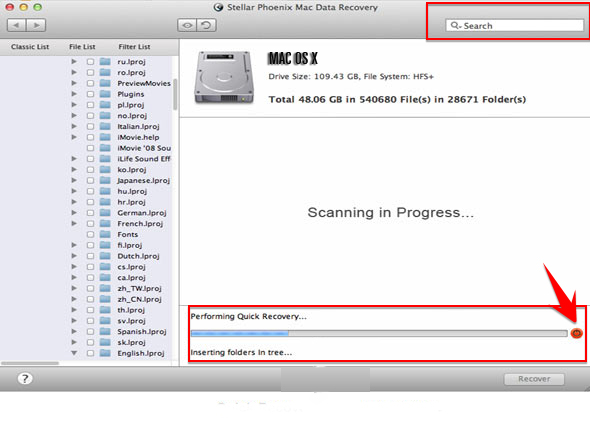
3. Stellar Phoenix scans have a progress bar that notes the time to completion. In general, the pace of recovery is good. There is a stop symbol right next to the progress bar and its sole function is to cease the scan midway. Users have the freedom to peruse folders to the left if they spot something of exceptional importance or come across the data that necessitated the scan in the first place. In this case, they can stop the process and recover the required items.
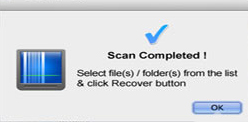
A scan ends with the following pop-up. Hitting the OK button brings up the display screen.
4. On the display screen, there are three list views that you can choose from. However, since the purpose of the tutorial is to recover deleted folders from a Mac hard drive, only the first view, the Classic List can be used.
The Classic List organizes the data that has been found for recovery exactly as it was prior to deletion, thus you can choose the folders that you must retrieve by their original names. Simply click on a main folder (i.e, Home) and from the expanded list, tick the sub-folders needed to be salvaged.
You can also use the search bar to the upper right of the screen to call folders by keywords. The individual items in a sub-folder show up to the right and these can be used to ensure you recover the right containers.
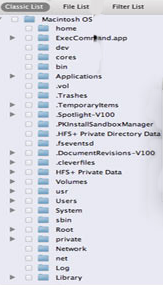
The other two views, File List and Filter List, are focused on groupings by data type and individual files that fit particular selection criteria.
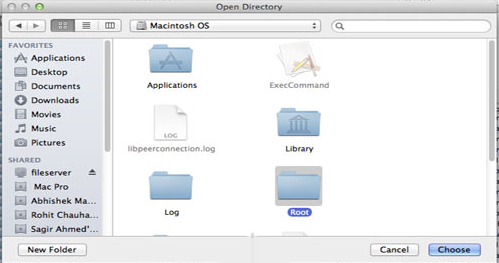
5. The only thing that is left to do is now is to hit the Recover button and save the folders to the drives in which they belong.
![]()
Stellar Phoenix is the gold standard answer to the question: how to recover Mac deleted folders. Recapping the steps:
- Launch Stellar Phoenix and choose Start New Scan.
- Select the drive to be scanned, the scanning method, and the scan mode.
- Allow the scan to complete.
- Choose the folders to be recovered.
- Reinstate the deleted folders to the hard drive.